





Refrigerator Thermometer Calibration, Placement, and Temperature Monitoring Guide
Maintaining precise temperature control inside a cold-storage unit is the primary line of defense against foodborne bacterial proliferation. Relying strictly on built-in control dials or internal factory thermostats often creates a false sense of security, as ambient air distribution inside a cabinet fluctuates continuously based on compressor cycles, loading density, and door openings. A dedicated refrigerator thermometer provides an independent, verifiable measurement of internal conditions, enabling commercial kitchen operators and household cooks to verify that perishable inventory remains safely stored at or below 40°F (4.4°C).
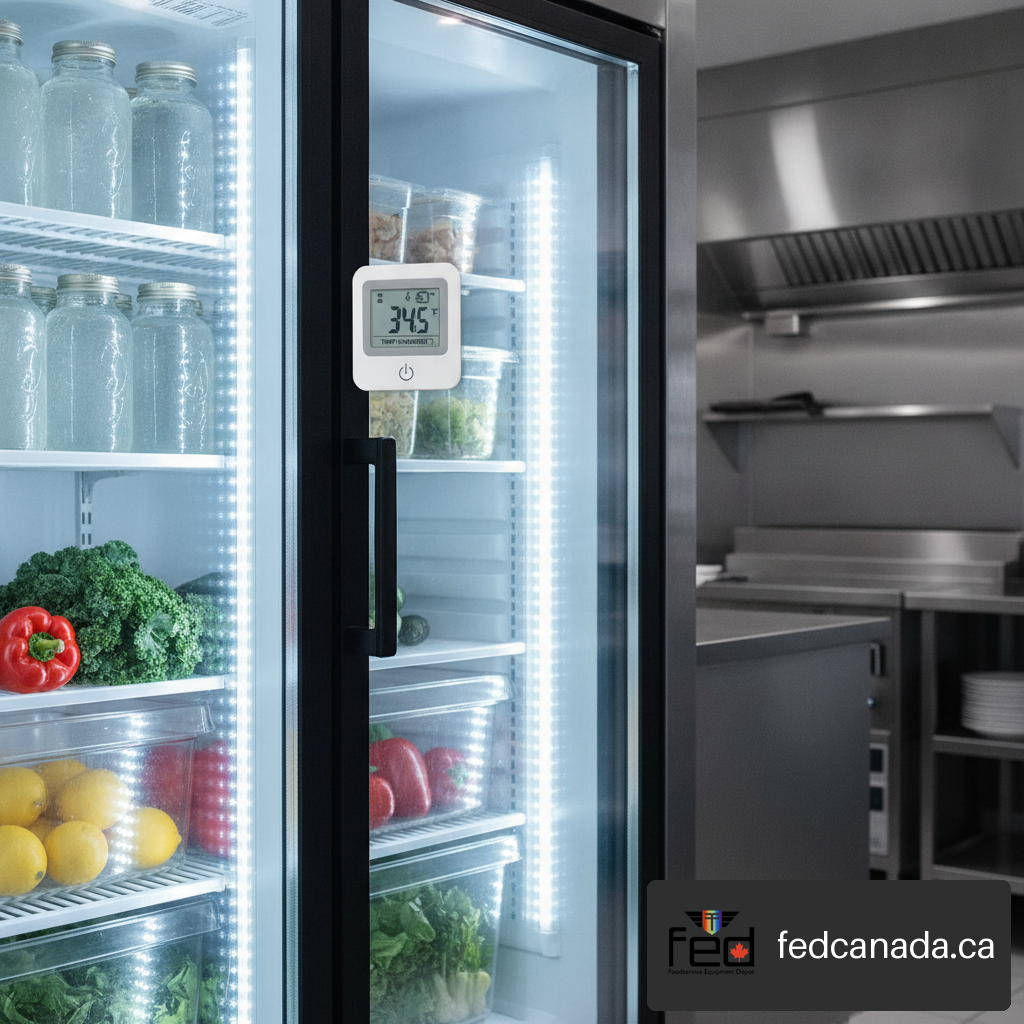
Table of Contents
- Key Takeaways
- Air vs. Water-Buffered Temperature Measurement Mechanics
- Refrigerator Thermometer Types and Architectural Trade-Offs
- Mapping Temperature Uniformity Across Refrigerator Microclimates
- Accuracy Verification, Calibration, and Replacement Guidelines
- Emergency Power-Outage Protocols and Equipment Limitations
- Frequently Asked Questions
- Sources and References
Key Takeaways
Critical Safety Threshold: Refrigerators must be maintained at or below 40°F (4.4°C) to inhibit bacterial growth. Food held above this threshold for more than two hours must be discarded.
Air vs. Product Temperature: Air temperatures inside a cabinet fluctuate rapidly when doors open, whereas water-buffered measurements mimic actual internal product core temperatures.
Warmest-Zone Placement: To ensure complete inventory safety, position sensors in the warmest accessible area—typically near the front door or top shelf—rather than directly against rear cooling coils.
Calibration Limitations: Many dial-style consumer appliance thermometers cannot be manually adjusted; if an ice-water test reveals a variance exceeding ±3°F, instrument replacement is required.
Diagnostic Separation: Discrepancies between two measuring devices often stem from cabinet airflow variation rather than instrument failure. Cross-verify devices side-by-side in a single zone before discarding hardware.
Air vs. Water-Buffered Temperature Measurement Mechanics
When evaluating cold-storage environments, understanding the physical distinction between ambient air temperature and liquid product temperature is fundamental. Air possesses a low thermal capacity, meaning it responds rapidly to external environmental shifts. Every time a refrigerator door opens, warm ambient room air rushes into the cabinet, causing open-air thermometer readings to spike instantly. However, solid food items and chilled liquids do not warm up at the same rate due to their higher mass and thermal inertia.
Why Air Temperature Fluctuates Rapidly
Inside an active refrigeration unit, cooling is delivered via forced convection or static evaporator coils. As cold air is blown into the compartment, ambient sensors record rapid temperature drops. Conversely, when the cooling cycle pauses or defrost heaters engage, air temperature rises quickly. An open-air thermometer simply captures these transient fluctuations. If an operator adjusts the main thermostat dial based on a single open-air reading taken immediately after loading inventory, they risk over-cooling the cabinet, freezing sensitive produce, or wasting energy.
The Water-Buffered Testing Protocol
To eliminate artificial spikes caused by routine door openings, food safety authorities recommend stabilizing the temperature sensor within a liquid buffer. According to USDA recommendations for appliance thermometers, refrigerator and freezer thermometers are specifically engineered for cold temperatures, and the agency advises placing the thermometer in a glass of water for 5 to 8 hours to establish a stabilized baseline reading.
By placing an analog stem or digital sensor probe inside a small container of water positioned in the middle shelf zone, the thermometer registers the thermal mass equivalent of stored food products rather than fleeting air currents. If this water-buffered measurement registers outside the target range of 38°F to 40°F (3.3°C to 4.4°C), the internal thermostat control should be adjusted, followed by another 5-to-8-hour stabilization window before re-reading.
Thermal Mass and Sensor Response Time
Different thermometer sensor materials exhibit distinct response times based on their physical mass and thermal conductivity:
- Bimetallic Strip Sensors: These mechanical elements expand and contract slowly, naturally dampening micro-fluctuations in air temperature, though they lack high precision.
- Bare Digital Thermistors: Thermistors respond within seconds to ambient changes, making them excellent for detecting door seal leaks but poor for assessing core food temperature unless buffered.
- Glycol-Encapsulated Probes: Commercial units often feature probes suspended in a sealed bottle of food-safe glycol. This design perfectly mimics liquid food storage, avoiding false alarms during routine cabinet access.
Refrigerator Thermometer Types and Architectural Trade-Offs
Selecting the appropriate instrument depends on whether the primary operational goal is routine inspection, regulatory compliance logging, or automated hazard monitoring. Appliance thermometers fall into three major structural categories, each presenting operational trade-offs.
Mechanical Dial and Bimetallic Strip Thermometers
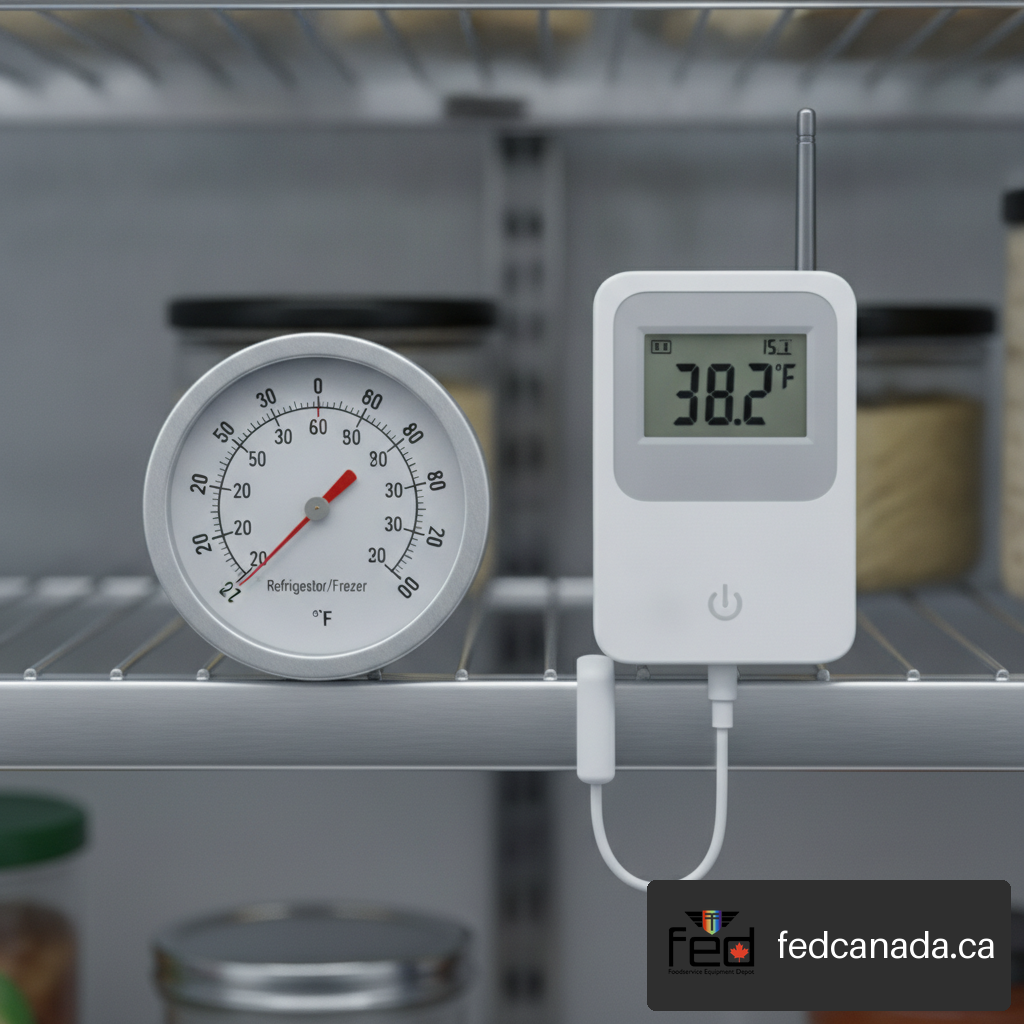
Mechanical dial thermometers rely on two bonded metals with differing thermal expansion coefficients. As temperature drops, the metal coil winds or unwinds, driving a mechanical pointer across a printed dial face. These units require no electrical power, making them highly reliable during extended utility disruptions. However, inexpensive mechanical units often suffer from lower accuracy tolerances and can lose calibration if dropped or exposed to physical impacts.
Digital Internal and Remote Probe Thermometers
Digital thermometers utilize electronic thermistors or resistance temperature detectors (RTDs) connected to a liquid crystal display (LCD). Advanced models feature a display mounted on the exterior of the appliance connected via a thin ribbon cable to an internal sensor probe. This architecture allows staff to read cabinet temperatures without opening the door, preserving internal cooling efficiency.
Wireless, Bluetooth, and IoT Monitoring Systems
Modern commercial kitchens and smart homes increasingly implement wireless radio-frequency (RF) or Wi-Fi-connected logging systems. These units feature remote sensors placed inside multiple equipment zones that transmit real-time data to a central hub or cloud interface. They offer automated data logging, programmable high/low alert thresholds, and immediate push notifications if a compressor fails overnight.
Comparative Analysis Matrix
The table below outlines the core characteristics, functional benefits, and limitations across primary refrigerator thermometer designs:
| Thermometer Style | Typical Accuracy Range | Power Source | Primary Advantage | Main Limitation |
|---|---|---|---|---|
| Bimetallic Dial | ±2°F to ±3°F (±1.1°C to ±1.7°C) | None (Mechanical) | Zero power required; low purchase cost | Slow response time; difficult to read precisely |
| Digital External LCD | ±1°F to ±2°F (±0.6°C to ±1.1°C) | Coin cell / AAA battery | External reading prevents cold air loss | Battery failure risks uninterrupted logging |
| Wireless RF / Wi-Fi | ±0.5°F to ±1.5°F (±0.3°C to ±0.8°C) | Rechargeable / Lithium | Remote continuous alerts & automated logs | Higher capital cost; depends on network signal |
| Liquid-in-Glass | ±1°F to ±2°F (±0.6°C to ±1.1°C) | None (Physical expansion) | Highly stable; no mechanical wear points | Fragile glass body; hazard if broken near food |
Mapping Temperature Uniformity Across Refrigerator Microclimates
A common mistake in food service management is assuming that a single temperature reading reflects conditions throughout the entire cabinet. Refrigerators are complex thermodynamic systems featuring distinct microclimates created by air inlet vents, drawer barriers, door shelves, and natural convection currents.
Identifying Warm and Cold Zones Inside the Cabinet
Under standard operational dynamics, air distribution follows predictable patterns:
Rear Evaporator Zone: Air directly adjacent to the rear cooling coil or discharge vent is the coldest point in the appliance. Placing moisture-heavy vegetables or liquid eggs here often leads to unwanted freezing.
Door Storage Bins: The door bins experience the highest cumulative ambient heat exposure. Every time the door swings open, warmer room air washes directly over these shelves, making them unsuitable for highly perishable items like raw dairy or pasteurized liquid eggs.
Top Shelving Area: Because warm air naturally rises, upper shelves generally maintain slightly warmer ambient temperatures than lower middle shelves, unless forced airflow diffusers direct primary cold air to the top.
Crisper Drawers: Closed drawers restrict airflow, maintaining higher humidity while insulating contents from abrupt air changes during door openings.
Warmest-Zone Sensor Placement Strategy
To establish a conservative food safety workflow, temperature monitoring should focus on the area most vulnerable to warming. As outlined in the California Department of Education food storage guidelines, refrigerated storage units should maintain temperatures between 32°F and 40°F, with sensor placement targeted at the warmest relevant air zone and instruments maintaining an accuracy threshold of approximately ±3°F. Positioning a primary sensor near the front door edge or on the upper door track ensures that if this area remains at or below 40°F (4.4°C), colder internal zones are guaranteed to reside in a safe range.
Disentangling Instrument Error from Cabinet Air Discrepancies
When two separate thermometers placed inside the same cabinet display conflicting values, operators frequently assume one instrument is broken. However, microclimate variances can easily cause a 3°F to 5°F difference between the top front door shelf and the lower rear coil zone.
To isolate instrument calibration error from cabinet air variation, use a side-by-side swap protocol. When comparing multiple devices, culinary community discussions on thermometer validation highlight that placing two meters side-by-side in the same environment and swapping their cabinet positions allows operators to separate sensor accuracy issues from internal airflow variations.
- Place Device A and Device B directly adjacent to one another on the center shelf.
- Allow the cabinet door to remain closed for a minimum of two hours.
- Record both displayed readings.
- Swap the exact physical positions of Device A and Device B.
- Wait another two hours and re-record the values.
If Device A consistently reads higher than Device B regardless of location, Device A possesses a systematic instrument offset. If the higher reading remains tied to a specific shelf position regardless of which device sits there, the difference stems from internal airflow dynamics.
Accuracy Verification, Calibration, and Replacement Guidelines
Because cold-storage instruments are subjected to constant moisture, vibration, and temperature cycling, their internal electronic components or mechanical springs can drift over time. Regular verification against a known physical reference standard ensures operational integrity.
Conducting the Ice-Water Reference Evaluation
The standard method for testing low-temperature thermometer accuracy relies on the thermal equilibrium point of melting ice water, which produces a stable 32°F (0°C) baseline.
- Fill a tall glass completely with crushed ice.
- Add clean cold water until the spaces between ice fragments are filled, ensuring ice rests on the bottom of the container without floating.
- Stir the slush mixture thoroughly and allow it to sit for three minutes to reach thermal equilibrium.
- Submerge the thermometer sensor or probe into the ice slush center, ensuring it does not touch the vessel sides or bottom.
- Wait two to three minutes until the mechanical dial stops moving or the digital LCD stabilizes.
- Compare the displayed temperature against 32°F (0°C).
Managing Non-Adjustable Thermometers and Discrepancy Thresholds
If the ice-water test reveals a variance within ±1°F (0.6°C), the unit is operating within high-precision tolerances. If the variance spans between ±1°F and ±3°F, the deviation should be logged on the casing face so staff can mentally adjust operational readings.
In practical kitchen discussions regarding thermometer accuracy troubleshooting, food safety practitioners emphasize verifying suspicious units against a calibrated probe thermometer, noting that many standard consumer dial models cannot be manually adjusted and must be replaced if out of tolerance. Trying to mechanically force a sealed bimetallic dial or adjust a budget digital unit often damages internal seals, leading to condensation ingress and total sensor failure.
Diagnostic Protocol for Readings Above 40°F (4.4°C)
If a verified, accurate thermometer displays a persistent reading above the critical 40°F (4.4°C) safety ceiling, execute the following systematic diagnostic sequence before calling an equipment service technician:
+-----------------------------------------------------------------------+ | TEMPERATURE READS ABOVE 40°F (4.4°C) | +-----------------------------------------------------------------------+ | v +-----------------------------------------------------------------------+ | STEP 1: Verify door seal integrity using paper bill pinch test. | | Are gaskets sealing tight around the entire frame? | +-----------------------------------------------------------------------+ | | YES NO | | v v +---------------------------+ +-----------------------------------+ | STEP 2: Check condenser | | ACTION: Clean or replace worn | | coil cleanliness. Is air | | door gasket seals immediately. | | intake blocked by dust? | +-----------------------------------+ +---------------------------+ | | YES NO | | v v +-------------------+ +-----------------------------------------------+ | ACTION: Clean | | STEP 3: Check internal air circulation vents. | | intake coils with | | Are boxes stacked tightly against air vents? | | soft brush/vacuum.| +-----------------------------------------------+ +-------------------+ | | YES NO | | v v +------------------------+ +--------------------+ | ACTION: Restructure | | ACTION: Adjust | | storage to re-establish| | main thermostat | | airflow gaps. | | setting colder. | +------------------------+ +--------------------+
Emergency Power-Outage Protocols and Equipment Limitations
Utility disruptions present significant hazards to cold storage management. Knowing how long an unpowered appliance can safely retain internal conditions—and how to evaluate inventory afterward—prevents costly product loss and foodborne illness.
Cold Retention and Emergency Temperature Monitoring
During a utility outage, a fully loaded residential or commercial refrigerator typically maintains safe storage temperatures below 40°F (4.4°C) for approximately 4 hours, provided the cabinet doors remain completely closed. A half-full unit loses cold air significantly faster due to the reduced total thermal mass inside the compartment.
Having an external digital display thermometer or wireless remote logger proves vital during electrical failures. Operators can continuously evaluate internal heat decay without opening the door and releasing precious cold air. Under established USDA refrigeration safety standards, refrigerators should be at or below 40°F (4.4°C), and an appliance thermometer is recommended when no built-in thermometer is available.
The Two-Hour Safety Threshold and Action Triggers
Once power returns, inspect internal thermometer readings immediately to determine appropriate inventory actions based on established time-and-temperature safety rules:
Conditions Below 40°F (4.4°C): If the internal water-buffered reading remains at or below 40°F when power is restored, all stored food items are safe for continued use.
Conditions Above 40°F for Under 2 Hours: If internal temperatures rise between 40°F and 50°F but utility restoration occurs within two hours, perishable inventory must be cooked or consumed immediately.
Conditions Above 40°F Exceeding 2 Hours: Food held above 40°F for more than two hours enters the bacterial temperature danger zone. Perishable goods—including raw meats, cooked leftovers, soft cheeses, and open dairy products—must be discarded.
What a Refrigerator Thermometer Cannot Diagnose
While an appliance thermometer effectively reports ambient environment data, operators must understand its diagnostic boundaries:
- Internal Food Core Temperatures: An air thermometer measures cabinet conditions, not the internal core temperature of dense foods like large turkeys or deep stockpots. Use a needle probe insertion thermometer to verify internal mass cooling rates.
- Defrost Cycle Timing Failures: Brief, transient temperature surges occur naturally during automatic equipment defrost cycles. A basic dial thermometer cannot distinguish between a healthy 20-minute defrost cycle and an impending compressor capacitor breakdown.
- Refrigerant Leaks: A thermometer identifies the symptom of warming air but cannot isolate whether failure stems from low refrigerant charge, broken fan motors, choked air filters, or blown thermal fuses.
Frequently Asked Questions
What exact temperature should a refrigerator thermometer display?
A safe reading should fall strictly between 35°F and 38°F (1.7°C to 3.3°C). While the absolute maximum regulatory safety ceiling is 40°F (4.4°C), targeting 36°F to 37°F provides a protective buffer against minor warming spikes during peak kitchen usage hours without risking localized food freezing.
Why does my refrigerator thermometer differ from the digital display on the appliance door?
Built-in door displays often reflect pre-set target control settings or measure air temperature directly at the evaporator return vent. An independent thermometer measures conditions where food actually sits. Discrepancies occur because of temperature stratification inside the cabinet or thermal lags between electronic control boards and secondary sensors.
Should a refrigerator thermometer sit in a glass of water or hang in open air?
For routine air-flow checks, open-air hanging placement works well. However, for precise food safety verification, placing the sensor inside a small glass or jar of water creates a thermal buffer. This simulates actual product core temperatures and prevents false high readings caused by opening cabinet doors during inspection.
How long must I wait before trusting a new thermometer reading?
When installing a new mechanical or digital thermometer, allow the instrument to rest inside the closed cabinet for a minimum of 5 to 8 hours. This stabilization period ensures the sensor casing, mounting hardware, and thermal mass achieve complete thermal equilibrium with the surrounding storage environment.
How can I tell whether two disagreeing thermometers are faulty or measuring different zones?
Place both instruments directly side-by-side on the center shelf for two hours and record their readings. Then swap their physical positions and wait another two hours. If the higher reading follows the specific thermometer regardless of position, the device has an internal calibration error. If the higher reading remains tied to a specific location, the variance is caused by internal airflow patterns.
Can I recalibrate an analog or digital refrigerator thermometer if it loses accuracy?
Most modern consumer analog dial thermometers and digital appliance units feature sealed housings that cannot be mechanically adjusted. If an ice-water test reveals a variance greater than ±3°F (±1.7°C), the unit should be retired and replaced to maintain food safety integrity.
Where is the absolute worst place to hang a refrigerator thermometer?
Avoid placing sensors directly in front of primary cold air discharge vents, where incoming freezing air creates artificially low readings. Likewise, do not mount thermometers directly against the warm interior lighting housing or on lower rear walls where ice build-up interferes with air movement around the sensor coil.
Sources and References
USDA Food Safety and Inspection Service — Appliance Thermometers
USDA Food Safety and Inspection Service — Refrigeration & Food Safety
California Department of Education — Proper Storage Temperatures for USDA Foods
Reddit, r/AskCulinary — How can I tell which one of my refrigerator thermometers is accurate?
Reddit, r/foodsafety — How accurate are these thermometers?
Recent Posts



Leave a Comment
Your email address will not be published. Required fields are marked *