





Rotisserie Cooking: Better Balance, Browning, and Safety
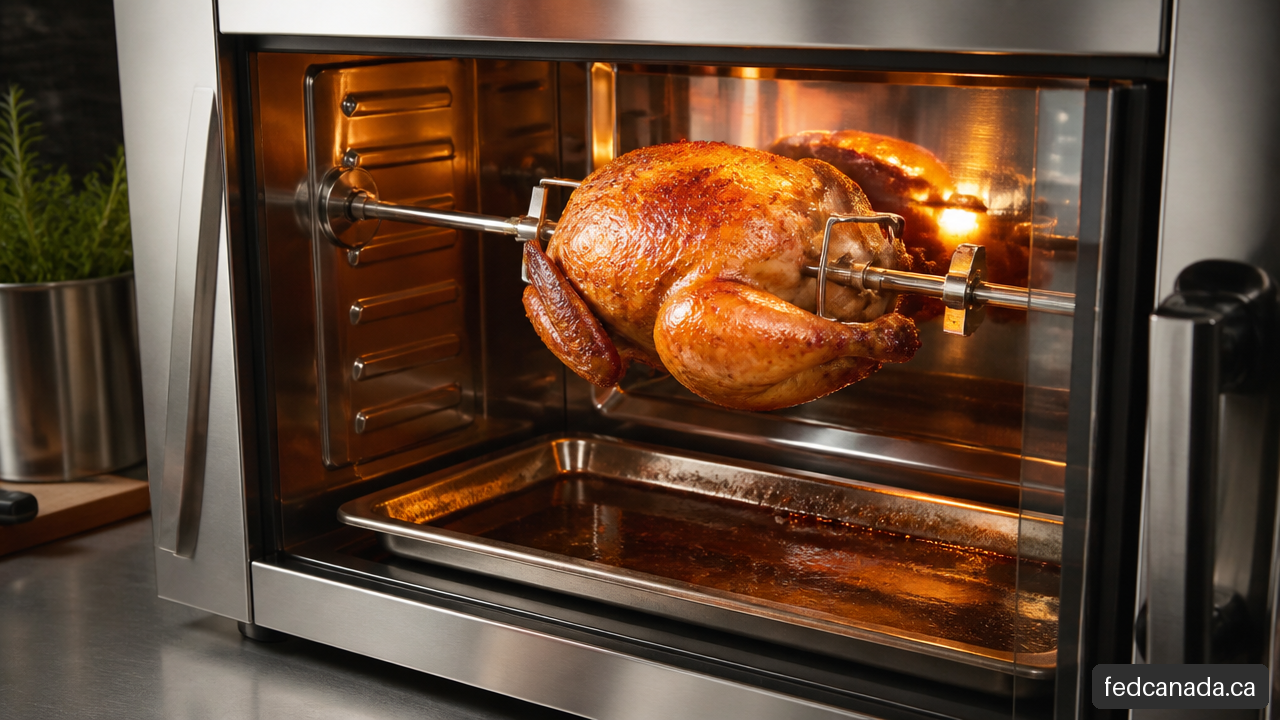
Rotisserie cooking turns a simple roast into something more dynamic: meat rotates through the heat, rendered fat moves across the surface, and the exterior gradually develops a deep, savory crust. I recommend thinking of a rotisserie as both a cooking method and a mechanical system. Great results depend on seasoning and temperature, but also on balance, clearance, secure forks, and a properly working motor.
Table of Contents
- Key Takeaways
- How Rotisserie Cooking Works
- Set Up, Cook, and Check Doneness Safely
- Choose Equipment and Solve Common Problems
- Rotisserie FAQ
- Sources and References
Key Takeaways
- A rotisserie cooks food by slowly rotating it around a spit near a heat source. The movement can encourage even surface browning and allow juices and fat to move across the food during cooking.
- Balance matters as much as seasoning. An off-center chicken or roast can wobble, strain the rotisserie motor, scrape a pan, or stop turning altogether.
- Use a drip pan under the food, keep loose poultry parts tied down, and confirm that the rotating food clears heating elements, walls, trays, and the door.
- Cooking time is only an estimate. Check doneness with a clean thermometer, especially when cooking poultry or when using a new appliance.
- Countertop rotisserie ovens suit compact, contained cooking. Grill rotisserie attachments generally offer more room for large birds and roasts, but grease management and weather exposure can require more attention.
How Rotisserie Cooking Works
Why rotation changes roasting
A rotisserie spit holds food horizontally while a rotisserie motor turns it at a slow, steady pace. Instead of one side of a chicken or roast facing the heat for the entire cook, every side repeatedly passes through the same hotter and cooler zones. This can reduce the pronounced top-versus-bottom contrast that sometimes occurs in conventional roasting.
Rotation also changes what happens on the surface. As fat renders, it travels around the meat rather than pooling in one fixed spot. That movement is often described as self-basting. It can help keep the exterior glossy and flavorful, although it does not replace sound temperature control. A chicken cooked too hot, too close to an element, or far beyond its target internal temperature can still dry out.
The ideal result is a clear contrast: crisp, browned skin or a dark roast crust outside, with moist meat inside. That outcome comes from three conditions working together:
- Stable heat that cooks the center at a reasonable pace.
- Consistent rotation that avoids one-sided scorching.
- A secure, balanced load that lets the motor turn without resistance.
For many rotisserie recipes, moderate to high heat is common. ILVE’s rotisserie temperature guidance describes an approximate range of 375°F to 450°F, or 190°C to 230°C, depending on the recipe and appliance. That is a useful operating range, not a universal rule. A compact countertop oven may brown food quickly at 425°F, while a large grill with the burners set for indirect heat may need a different setup.
Seasoning for a rotating cook
A dry rub is often the simplest choice for rotisserie meat because it adheres well. Salt, pepper, paprika, garlic, herbs, and a small amount of oil can form an even coating without adding excess liquid that may drip early or burn.
Brining can help poultry retain seasoning and moisture, especially for a whole chicken or turkey. If you brine, dry the skin very thoroughly before placing the bird on the spit. Damp skin steams before it browns. A dry-brined chicken, left uncovered in refrigeration after salting, can be especially useful when crisp skin is the priority.
Marinades add flavor, but they require more care. Sugary marinades can darken quickly near an exposed heating element. If a marinade contains honey, brown sugar, maple syrup, or sweet sauces, use it sparingly at the start and apply a final light basting closer to the end only if the surface is not already browning rapidly.
Rotisserie cooking rewards restraint. A securely mounted, evenly seasoned chicken usually performs better than one overloaded with wet sauce, loose herbs, and untied wings.
The balance test before heat goes on
A chicken can look centered and still be unbalanced. The issue is not only whether the bird sits in the middle of the rod; it is whether its weight is distributed evenly around the spit.
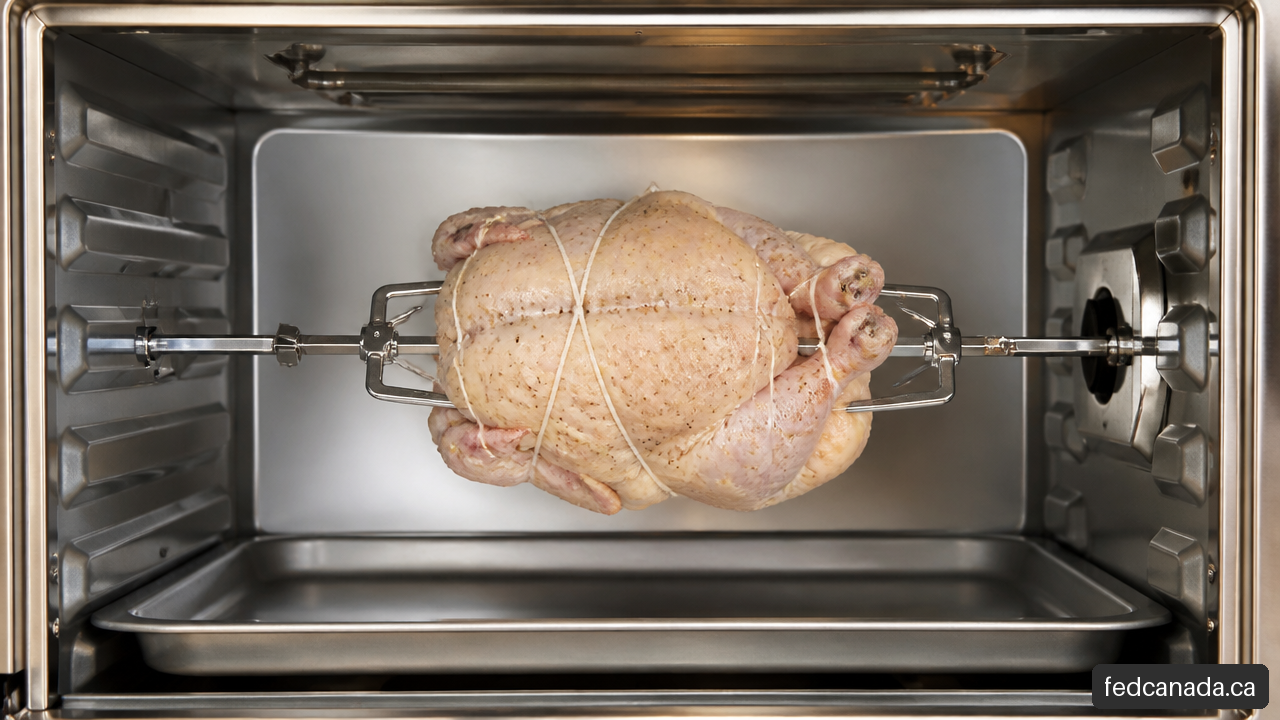
Before preheating, place the loaded spit on its supports and rotate it manually. Watch the same point of the bird as it turns. If the breast repeatedly drops toward the bottom, or the rod rolls backward after you stop it, the load is likely uneven. Reposition the bird, tighten the forks, or adjust the legs and wings with kitchen twine.
For a whole chicken, guide the spit through the body cavity so the rod runs as close as possible to the bird’s centerline. Push one rotisserie fork deeply into the breast end and the other into the thigh end. Tie the legs together and tuck or tie the wing tips against the body. This produces a more compact shape and reduces the risk of a wing contacting a pan or element.
Maintaining at least 1 inch, or 2.5 cm, of clearance from the heating element and securing food so it does not contact the baking pan. That small gap is not a minor detail. In a countertop oven, a plump breast, loose wing, or hanging roast can expand toward the element as it cooks.
Set Up, Cook, and Check Doneness Safely
A practical setup sequence
I recommend following a deliberate sequence instead of trying to correct problems once hot grease and metal are involved.
- Place the appliance on a flat, heat-resistant surface with adequate ventilation.
- Install a clean drip pan beneath the food. Confirm the pan is large enough to catch fat through the full rotation.
- Truss or tie loose parts with food-safe cotton kitchen twine.
- Slide food onto the spit, install the forks, and tighten them firmly.
- Test the rotation cold. Check the door, pan, walls, supports, and heating elements for clearance.
- Preheat if the appliance instructions call for it, then load the spit carefully.
- Monitor the first few minutes. This is when wobbling, rubbing, or a loose fork becomes obvious.
Users are best to operate the unit on a suitable surface, choose the rotisserie setting, and turn the appliance off and unplug it after cooking. Follow the manual for your exact appliance, especially for loading, rack placement, and removal. Rotisserie assemblies vary more than they appear to at first glance.
Time is a planning tool, not proof of doneness
A whole chicken may cook relatively quickly in a compact rotisserie oven, but weight, starting temperature, shape, appliance accuracy, and heat exposure can move the finish time substantially. A large bird with a cold cavity cooks differently than a small, evenly trussed chicken. A roast with a thick fat cap cooks differently than a lean, cylindrical pork loin.
Use time to decide when to start checking, not when to stop cooking. Securing food with forks and twine, following appliance-specific timing, and confirming doneness with a thermometer.
Open the door or grill lid only when you are ready to check. Insert the thermometer promptly, then close the appliance again. Repeated long checks shed heat and make timing less predictable.
Canada-focused temperature decisions
For food safety, appearance is not enough. Golden skin, clear-looking juices, or a timer reaching zero does not prove that the thickest part has cooked completely. Health Canada’s food-safety guidance says food should be cooked completely and checked with a clean thermometer.
Use the table as a decision guide, then follow the specific product, recipe, and local food-safety direction that applies to what you are cooking.
| Food | Practical thermometer placement | Temperature decision | Rotisserie note |
|---|---|---|---|
| Whole chicken or turkey | Thickest part of the thigh, avoiding bone | Cook poultry to 74°C / 165°F | Check both thighs on a large bird if browning appears uneven. |
| Chicken pieces on a basket or rod | Thickest section of the largest piece | Cook poultry to 74°C / 165°F | Small pieces can finish unevenly if packed tightly. |
| Pork roast | Center of the thickest section, away from bone | Target depends on cut and applicable guidance | Resting improves slicing, but it is not a substitute for verifying temperature. |
| Beef roast | Center of the thickest section | Target depends on preferred doneness and food-safety guidance | Shape and thickness matter more than weight alone. |
| Stuffed poultry | Center of stuffing and thickest meat area | Both areas must reach a safe temperature | Avoid overpacking; dense stuffing slows heat movement. |
For chicken, place the probe in the thickest area of the thigh without touching bone. The breast may be fully cooked sooner, but the thigh is often the better final checkpoint because it is dense and close to the body cavity. Let the chicken rest before carving so juices settle and the hot spit can be handled more safely.
Prevent smoke before it starts
Some smoke is normal when fat renders. Thick, persistent smoke is a signal to investigate. The likely causes are grease striking an exposed element, a shallow or badly positioned pan, sugary residue burning, or food rubbing against a hot surface.
Use a pan that sits directly beneath the rotating food. If the pan contains a large amount of hot grease, allow the appliance to cool enough for safe handling before emptying it. Do not add water to hot grease. On a grill rotisserie, keep the food over indirect heat whenever possible and use a properly positioned drip pan to reduce flare-ups.
Choose Equipment and Solve Common Problems
Countertop rotisserie oven or grill attachment?
Neither format is automatically better. The right choice depends on food size, available outdoor space, cleanup expectations, and how often you plan to use the rotisserie function.
| Decision factor | Countertop rotisserie oven | Grill rotisserie attachment |
|---|---|---|
| Best for | Whole chickens, small roasts, compact meals | Larger poultry, rib roasts, bulk outdoor cooking |
| Capacity limit | Interior height, width, and element clearance | Grill width, lid height, spit length, motor capacity |
| Heat control | Enclosed electric heat, often simple to contain | Burner setup, wind, ambient temperature, indirect zones |
| Cleanup | Drip pan and interior walls need regular cleaning | Grease tray, grill grates, burners, and drip pan need attention |
| Placement | Requires heat-safe counter space and ventilation | Requires compatible grill mounting and suitable outdoor use |
| Main risk | Food contacting elements or pan | Flare-ups, uneven burner heat, weather exposure |
When comparing models, check more than the advertised capacity. Measure the usable space from spit to heating element, pan to food, and food to door. Then compare that with the actual dimensions of the chicken, roast, or basket you expect to cook.
Also consider replacement parts. A rotisserie is less useful if a lost fork, worn drive socket, or failed motor cannot be replaced. For frequent use, practical serviceability can matter more than an extra preset button.
A failure-mode guide for wobble, smoke, and binding
| Visible symptom | Likely cause | What to do before continuing |
|---|---|---|
| Food slips or rotates independently of rod | Forks are shallow, loose, or mounted in soft skin only | Reposition forks deeper into meat and tighten fasteners. Add twine for loose sections. |
| Spit wobbles | Food mass is off-center or legs and wings are unevenly positioned | Stop, rebalance, and hand-turn the rod before reheating. |
| Motor slows or stops immediately | Overloaded, severely unbalanced food, or poor spit seating | Remove the load, check supports and drive engagement, then retry with a balanced setup. |
| Motor runs but spit does not turn | Drive socket or rod is not engaged | Turn off the appliance, reseat the spit, and verify the correct end is in the drive socket. |
| Assembly binds after heating | Tight hardware fit, alignment issue, or thermal expansion | Stop cooking safely, let equipment cool, and inspect the shaft and supports. Do not force the motor. |
| Heavy smoke | Grease hits an element, pan is misplaced, or sugary residue burns | Turn heat down or off as needed, let the appliance cool, then clean and reposition the pan. |
| One side browns faster | Heat source is uneven or food is too close to one side | Recenter food, verify clearance, and use appliance-specific heat settings. |
A useful distinction: if the spit struggles while cold, suspect food balance or loading first. If it turns freely cold but binds after heating, a mechanical fit issue becomes more plausible. A community report involving a Masterbuilt rotisserie described a shaft becoming constrained after heating, illustrating how thermal expansion can create binding even when a cold setup appears normal. This is anecdotal rather than a universal diagnosis, but it is a good reason not to force a hot mechanism.
Cleaning and storage protect performance
Grease left on a spit, forks, drip pan, or drive-area surfaces can become baked-on residue during the next cook. After the appliance has cooled, remove the rod and forks, wash removable parts as the manufacturer directs, and wipe grease from interior surfaces. Avoid soaking electrical components or allowing grease to build around the motor connection.
For removal, support the loaded spit securely and follow the appliance’s specific order of operations. Some countertop designs require disengaging the drive side before withdrawing the opposite end. Hot forks and rods retain heat longer than expected, so use oven mitts and place them on a heat-safe surface.
Rotisserie FAQ
What is rotisserie cooking?
Rotisserie cooking uses a motor-driven spit or rod to rotate food near a heat source. It differs from standard roasting because the food moves continuously, which can support more even surface browning and help rendered fat circulate around the exterior.
How long does rotisserie chicken take?
There is no single reliable time because chicken weight, oven or grill temperature, trussing, and appliance performance all matter. Start with your manufacturer’s estimate, then check the internal temperature before serving. A small chicken in a compact oven may cook much faster than a large bird on a grill rotisserie.
Where should a thermometer go in rotisserie chicken?
Insert the probe into the thickest part of the thigh without touching bone. For a large chicken, check more than one location if the heat source seems uneven. Poultry should reach 74°C / 165°F.
Why does my rotisserie wobble?
Wobble usually means the food is not balanced around the spit, although loose forks or improperly seated supports can also cause it. Stop the motor, reposition the load, tie loose limbs, and test rotation by hand before resuming.
Why is my rotisserie motor struggling or stopping?
Start by checking food weight, balance, and spit alignment. If the assembly turns smoothly when cold but binds once hot, stop using it until it cools and inspect the shaft, supports, and drive connection. Forcing a struggling motor can damage gears or create an unsafe situation.
Can I cook vegetables or small cuts on a rotisserie?
Yes, but use a basket, cage, or skewers designed for the appliance. Small loose foods can shift during rotation, fall into a drip pan, or create imbalance. Dense vegetables such as potatoes, onions, and peppers generally hold up better than delicate items unless they are secured in a basket.
Is rotisserie chicken healthier than fried chicken?
Rotisserie chicken is typically prepared without a deep-fried coating, but the final nutrition depends on portions, skin, seasoning, sauces, and added fat. If a lighter meal is the goal, remove skin after cooking and serve the chicken with vegetables or whole grains rather than treating cooking method alone as the deciding factor.
Recent Posts
Leave a Comment
Your email address will not be published. Required fields are marked *