




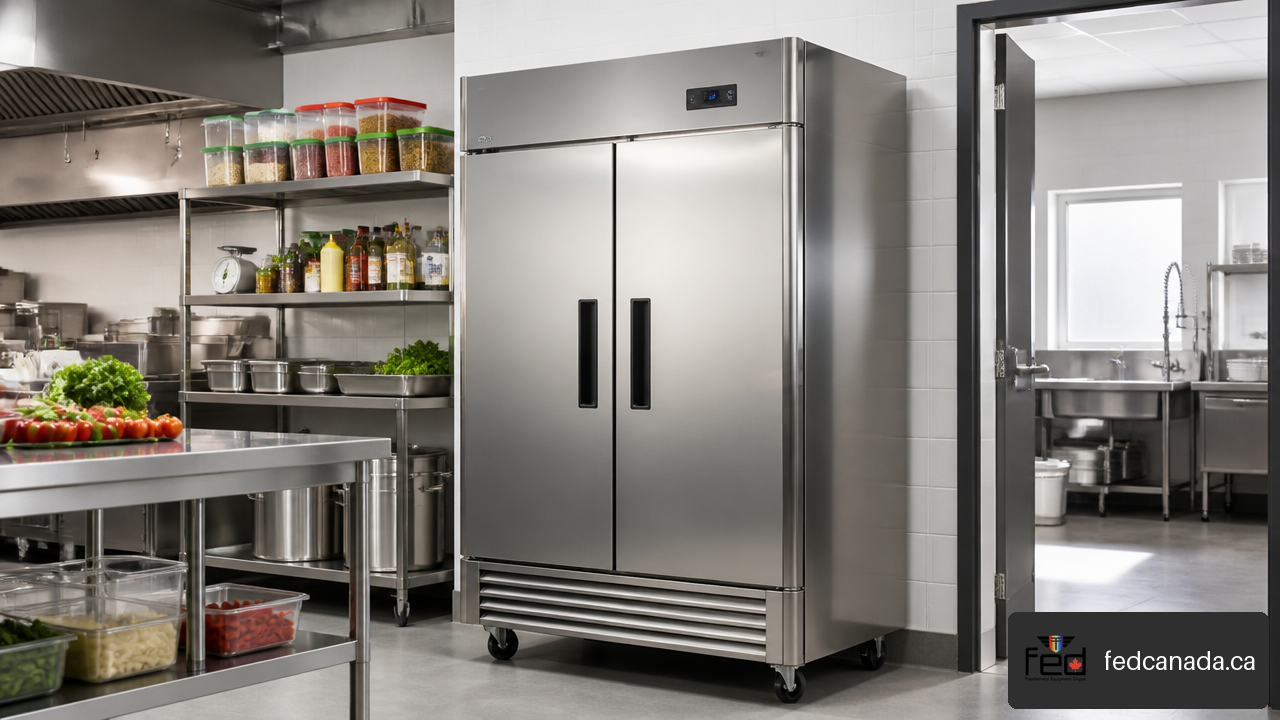
Turbo Air Reach-In Refrigerators: Settings, Troubleshooting and Buying Guide
Turbo Air Reach-In Refrigerators
Turbo Air Reach-In Refrigerators: Settings, Troubleshooting and Buying Guide starts with one practical point: the number on the controller is a relative cooling level, not a universal cabinet temperature. A reach-in can be powered on, display a normal setting, and still need time, airflow, or service attention before it protects food reliably.
Table of Contents
- Set and verify Turbo Air temperatures
- Troubleshoot poor cooling safely
- Choose the right Turbo Air reach-in
- Key Takeaways
- FAQ
- Sources and References
Set and Verify Turbo Air Temperatures
Understand what settings 1 through 7 mean
On documented Turbo Air M3 reach-ins, the controller uses levels 1 through 7. Level 1 represents a warmer compartment condition, while level 7 calls for a colder one. The factory default is level 4. The controller manages compressor cycling automatically, and the printed circuit board also controls automatic defrost. These operating details are set out in the Turbo Air M3 Series Reach-Ins owner’s manual.
That does not mean level 4 equals one fixed temperature across every Turbo Air reach-in. Cabinet size, door count, product load, room temperature, door traffic, model configuration, and whether the unit is a refrigerator or freezer all affect the result.
A refrigerator and a freezer also need separate expectations. A refrigerator is intended to hold refrigerated food temperatures; a freezer is designed for substantially colder storage. Do not try to make a refrigerator perform like a freezer by simply selecting level 7. That can lead to long run times, unstable performance, or misplaced troubleshooting.
Treat the controller level as a starting instruction to the equipment. Treat a measured cabinet temperature as the proof of actual performance.
Use a measurement based adjustment process
We recommend changing settings only after establishing a repeatable baseline. Adjusting the level repeatedly while doors are opening, product is being loaded, or the unit is defrosting makes the display harder to interpret.
Use this workflow:
Confirm the reach-in is plugged into its dedicated outlet and is level, ventilated, and not pressed against walls or other heat producing equipment.
Place a reliable thermometer or temperature probe in a representative location inside the cabinet. Avoid placing it directly in the path of an air discharge or against a warm product pan.
Record the controller level, displayed reading, measured temperature, time, door activity, and approximate product load.
Keep doors closed long enough for the cabinet to stabilize under ordinary conditions. There is no universal pull-down time that applies to every Turbo Air model, installation, and food load.
If the measured cabinet temperature remains too warm after stabilization, move the control one level colder, then repeat the observation period.
If the cabinet is colder than required or product is at risk of freezing, move it one level warmer and verify again.
This method prevents a common mistake: treating a brief warm reading as evidence that the controller must be changed. For example, a newly stocked reach-in may warm because several pans of product are releasing heat into the cabinet. Changing from level 4 directly to level 7 may mask the loading issue while adding strain to the system.
Recognize normal cycling, defrost, and fan behaviour
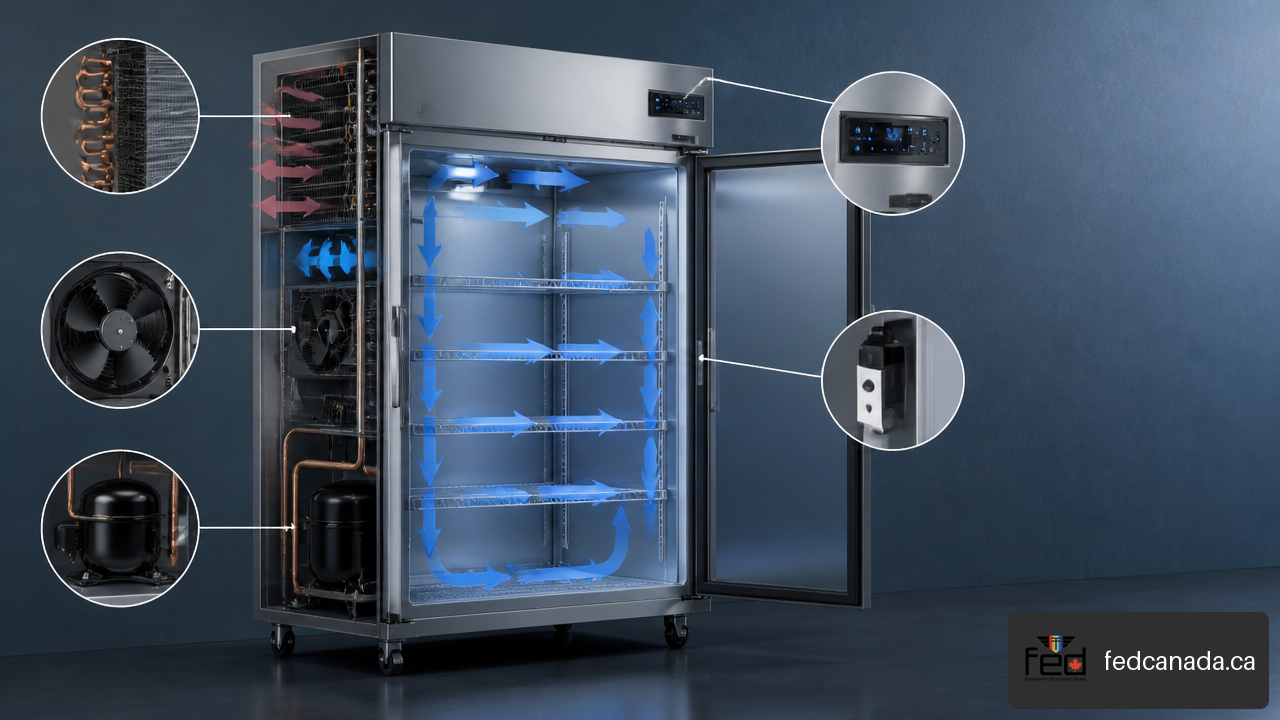
Turbo Air reach-ins do not run in one continuous, identical pattern. The compressor starts and stops under controller direction. Defrost cycles can temporarily change how the cabinet behaves, and temperature recovery after defrost or door openings may take time.
The evaporator fan deserves special attention. On M3 equipment, fan operation depends on doors being fully closed, with details varying by model configuration. If a fan appears stopped with a door open, that alone does not prove the motor has failed. Close the door completely, allow the door switch to engage, and then observe operation safely.
A brief defrost display or a period of reduced cooling can also be normal. In a community discussion about an M3 refrigerator, technicians noted that defrost behaviour, evaporator sensors, and controller parameters can all contribute to intermittent cooling symptoms. See the Turbo Air intermittent cooling discussion for that diagnostic distinction.
Avoid changing advanced controller or defrost parameters without model specific documentation. A setting that looks minor may control defrost timing, sensor logic, compressor delay, or another protection function. Record existing values before a qualified technician changes anything.
Troubleshoot Poor Cooling Safely
Start with operator safe checks
Before assuming a refrigerant or compressor failure, check the simple conditions that prevent a reach-in from rejecting heat or circulating cold air. These checks are useful because they can identify a correctable airflow problem without opening electrical compartments or the sealed refrigeration system.
Confirm the outlet has power and that the unit is switched on.
Verify the door closes, the gasket seals, and food pans or packaging are not preventing closure.
Check that vents inside the cabinet are not blocked by product.
Look for heavy dust, grease, cardboard, or other obstructions around the condenser air path.
Confirm there is room around the unit for air circulation and that the surrounding room is not unusually hot.
Observe whether the display shows a defrost state before concluding cooling has stopped.
With doors closed, listen and look for expected compressor and fan operation without touching moving parts.
Cleaning condenser surfaces and maintaining clearance matter because the refrigeration system must move heat out of the cabinet. If heat cannot escape, the compressor may run longer while the cabinet temperature drifts upward. Community troubleshooting of a warming TGM-72RS identified dirty condenser coils, blocked airflow, failed fans, high ambient conditions, refrigerant leakage, and restrictions as plausible causes. The TGM-72RS temperature rise discussion is a useful reminder to check airflow first, then escalate persistent faults.
Run a controlled recovery test
A timed recovery test is more useful than watching the cabinet casually throughout a busy service. It creates a simple record that can separate door traffic or defrost from a persistent refrigeration failure.
Record the cabinet’s measured temperature and controller display.
Note whether the unit may be in defrost, and check that doors are fully closed.
Avoid loading warm food or opening doors during the test period.
Record compressor and fan status from a safe visual or audible distance.
Recheck the temperature at planned intervals and record whether the cabinet begins recovering, holds steady, or continues warming.
If cooling resumes after a defrost condition and the cabinet recovers normally, document the event and continue monitoring.
If the cabinet continues rising or cannot recover under closed door conditions, stop relying on setting changes and arrange service.
There is no universally published recovery time suitable for every model, installation, and load. A compact cabinet with little product behaves differently from a fully loaded three door unit in a hot kitchen. The value of this test is the trend: a stable decline toward the intended operating condition is different from a cabinet that warms despite a running system.
Match symptoms to the next action
| What you observe | Likely first interpretation | Operator action | When to call service |
|---|---|---|---|
| Cabinet warms after frequent openings | Door traffic or warm product load may be affecting recovery | Reduce openings, verify door closure, measure recovery | Temperature remains unsafe after closed door recovery test |
| Fan seems off with a door open | Door switch logic may be stopping the evaporator fan | Close door fully and observe again | Fan remains inoperative when it should run |
| Compressor and condenser fan are both off while warm | Control state, delay, defrost, power, or component issue may be involved | Check display state, power, and documented settings | Unit does not restart or warming persists |
| Compressor runs but cabinet stays warm | Airflow, ice, fan, refrigerant circuit, or compressor performance may be involved | Check condenser cleanliness and airflow only | Persistent poor cooling requires qualified diagnosis |
| Partial frost pattern or ice buildup | Airflow or defrost issue may be possible | Avoid scraping coils or forcing a defrost setting | Technician should inspect sensors, heater, and sealed system |
| Unit reaches temperature then warms | Restart behaviour, fan operation, overload, relay, switch, or control logic may matter | Document cycle and component status | Recurring temperature rise needs professional diagnosis |
A freezer that reaches a low temperature and later warms is especially easy to misread. In a technician discussion involving an M3F47-2, the recommended diagnostic focus included compressor restart behaviour, condenser and evaporator fan operation, door switches, relays, overload protection, and controls. The M3F47-2 freezer troubleshooting thread supports checking the sequence of operation rather than assuming the unit has simply run out of refrigerant.
Know where operator work ends
Operators can safely manage cleaning, clearance, door gaskets, product placement, basic visual checks, and documentation. They should not attempt refrigerant charging, leak repair, compressor replacement, live electrical testing, control board programming, or repairs that require opening the sealed system.
This boundary is particularly important for applicable R-600a models. R-600a is flammable, and the M3 manual states a minimum room-volume requirement of 35.31 cubic feet per 0.28 ounce, or 1 cubic metre per 8 grams, of refrigerant. Installation, damage, unusual odours, or suspected refrigerant issues should be handled cautiously and referred to qualified service personnel.
It is also possible for a unit to appear broadly functional while failing to refrigerate. One reported Turbo Air freezer case had power, lights, fan activity, and apparent compressor cycling but still did not cool; the discussion pointed beyond controller settings toward further diagnostic or warranty support. The Turbo Air freezer diagnostic case illustrates why visible activity is not proof of safe cabinet performance.
Choose the Right Turbo Air Reach-In
Select capacity and door configuration from workflow
Buying by exterior size alone can create a daily bottleneck. Start with what staff must retrieve during service, how often doors will open, and whether the cabinet is for bulk backstock or active line replenishment.
| Buying factor | Choose this when | Avoid this when |
|---|---|---|
| One door reach-in | Space is tight, volume needs are modest, or access is limited | Staff need frequent access to several product categories at once |
| Two door reach-in | You need a balance of capacity, footprint, and product separation | The available aisle cannot accommodate door swing and staff traffic |
| Three door reach-in | High volume storage and organized zones are priorities | The kitchen cannot provide adequate space, airflow, or electrical planning |
| Refrigerator | Ingredients must stay chilled for regular food preparation | You need frozen storage temperatures |
| Freezer | Frozen food storage is the actual requirement | Daily access is primarily to chilled ingredients |
| Solid doors | Energy retention and enclosed storage matter most | Staff need to identify inventory visually before opening |
| Glass doors | Product visibility or merchandising is useful | The application demands the most insulated, low viewing storage approach |
Measure more than the footprint. Include door swing, handle clearance, pathways, loading access, ceiling restrictions, and the route from receiving to the final location. A three door cabinet that barely fits against a wall may still be a poor choice if its condenser cannot breathe or doors interfere with a prep line.
Confirm electrical, environmental, and refrigerant requirements
A reach-in should have an outlet reserved for that appliance. The Turbo Air M3 manual specifically instructs users to connect the unit to a dedicated wall outlet. Do not plan around extension cords, overloaded receptacles, or a shared outlet with high draw kitchen equipment.
Before ordering, verify:
The exact model’s voltage, plug type, and electrical requirements.
The available dedicated outlet and circuit capacity.
The room conditions where the cabinet will operate.
Clearance for condenser airflow and future cleaning.
The refrigerant listed on the model documentation.
Delivery access, including doors, stairs, elevators, and receiving procedures.
For an R-600a model, installation space is not just a convenience issue. The manufacturer’s room-volume requirement must be respected. If the unit will be installed in a small enclosed storage room, verify the model documentation and site conditions before purchase rather than after delivery.
Compare ownership details before committing
The best purchase is the one that fits the menu, kitchen layout, utility supply, and service plan. Price matters, but an inexpensive cabinet that cannot fit through the receiving door or cannot maintain airflow clearance can become the costlier option.
Build a simple ownership file at delivery:
Photograph the model and serial number plate.
Save the owner’s manual, warranty information, and purchase documentation.
Record the refrigerant type, electrical information, controller level, and installation date.
Note the service contact route and keep a maintenance log.
Record repairs, control board changes, fan replacements, and recurring temperature events.
This documentation is useful when troubleshooting becomes more complex. If a control board is replaced, model specific settings may need to be verified; generic programming assumptions can create new problems. Clear records also help a technician identify whether a temperature issue followed a power event, board replacement, relocation, or change in kitchen conditions.
Key Takeaways
Use evidence, not controller numbers alone
Level 1 is warmer and level 7 is colder on documented Turbo Air M3 controls; level 4 is the default starting point, not a guaranteed final temperature.
Verify performance with a measured cabinet temperature and a controlled recovery observation.
Keep doors closed during diagnosis so door switches, evaporator fan logic, and ordinary door heat gain do not confuse the result.
Solve airflow issues before assuming a major failure
Check gasket sealing, product placement, condenser cleanliness, clearance, ambient conditions, and fan operation first.
A defrost indication can resemble intermittent cooling, so document the display state before changing settings.
Persistent warming, a running compressor with no cooling, or abnormal frost patterns require qualified refrigeration service.
Buy for installation as well as storage volume
Select refrigerator versus freezer based on food storage requirements, not controller settings.
Confirm door configuration, access path, dedicated electrical supply, ventilation space, and refrigerant requirements before ordering.
Keep model, serial, warranty, control, and service records from day one.
FAQ
What does setting 4 mean on a Turbo Air reach-in refrigerator?
Setting 4 is the documented default control level for Turbo Air M3 reach-ins. It is a middle relative setting, not a guaranteed cabinet temperature. Measure the compartment temperature under stable conditions before deciding whether to adjust it.
Does a higher Turbo Air setting make the refrigerator colder or warmer?
A higher number makes the controller call for a colder compartment condition. On the M3 scale, level 1 is warmer and level 7 is colder. Move only one level at a time, then verify the result with a thermometer.
How long should a Turbo Air reach-in take to cool after being plugged in?
There is no reliable universal time because cabinet size, starting temperature, room heat, door openings, product load, and model all matter. A useful approach is to log starting temperature and recovery trend with doors closed. If the cabinet does not trend colder or continues warming, investigate airflow and arrange service.
Why is my Turbo Air refrigerator showing a defrost indication?
A defrost indication can mean the controller has entered an automatic defrost cycle. Cooling behaviour may look different during that period. Let the cycle complete, keep doors closed where possible, and watch whether normal cooling resumes. If defrost states are frequent, prolonged, or followed by persistent warming, have the unit assessed.
Why is the evaporator fan not running when the refrigerator is powered on?
Check the door condition first. On relevant M3 configurations, evaporator fan operation can depend on doors being completely closed. If the fan remains off when the door switch should be engaged, or the cabinet cannot recover temperature, service is appropriate.
What should I check if the compressor runs but the cabinet stays warm?
Check condenser cleanliness, airflow clearance, ambient heat, door sealing, internal airflow blockage, and whether the unit is in defrost. If those conditions are acceptable and the cabinet remains warm, stop adjusting settings. A technician may need to evaluate fans, sensors, defrost components, compressor performance, or the sealed refrigerant system.
Can I adjust the defrost settings on a Turbo Air reach-in?
Avoid changing advanced defrost settings unless you have model specific service guidance and the authority to make the change. Incorrect values can affect cooling recovery and ice control. Record current settings and involve a qualified technician for recurring defrost related problems.
What information is needed when requesting Turbo Air service?
Provide the malfunction description, model number, serial number, controller display, measured cabinet temperature, recent changes, and results of basic checks. Include whether the unit was moved, lost power, had a board replaced, or entered repeated defrost states. This gives service personnel a much clearer starting point.
Sources and References
Turbo Air Inc. — M3 Series Reach-Ins Refrigerators & Freezers Owner’s Manual: https://turboairinc.com/documents/turb-manuals/ta/user_manual/M3%20Reach-in_HC.pdf
Reddit r/refrigeration — Turbo Air freezer not cooling: diagnostic help: https://www.reddit.com/r/refrigeration/comments/160jwc1/turbo_air_freezer_not_cooling/
Reddit r/refrigeration — Turbo Air Intermittent Cooling question: https://www.reddit.com/r/refrigeration/comments/rxecug/turbo_air_intermittent_cooling_question/
Reddit r/refrigeration — Turbo Air M3F47-2: https://www.reddit.com/r/refrigeration/comments/1jpecos/turbo_air_m3f472/
Reddit r/refrigeration — TGM-72RS temperature-rise discussion: https://www.reddit.com/r/refrigeration/comments/gelgb6/tgm72rs_weve_had_for_about_2_weeks_previous_owner_didnt_use_it_initially_was_around_60_degrees_but_its_slowly_been_creeping_up_to_closer_to_70_what_would_cause_it_to_increase_temperatures_within_a_week/
Recent Posts



Leave a Comment
Your email address will not be published. Required fields are marked *