



Butchers Knives: Choosing the Right Blade for Every Cut
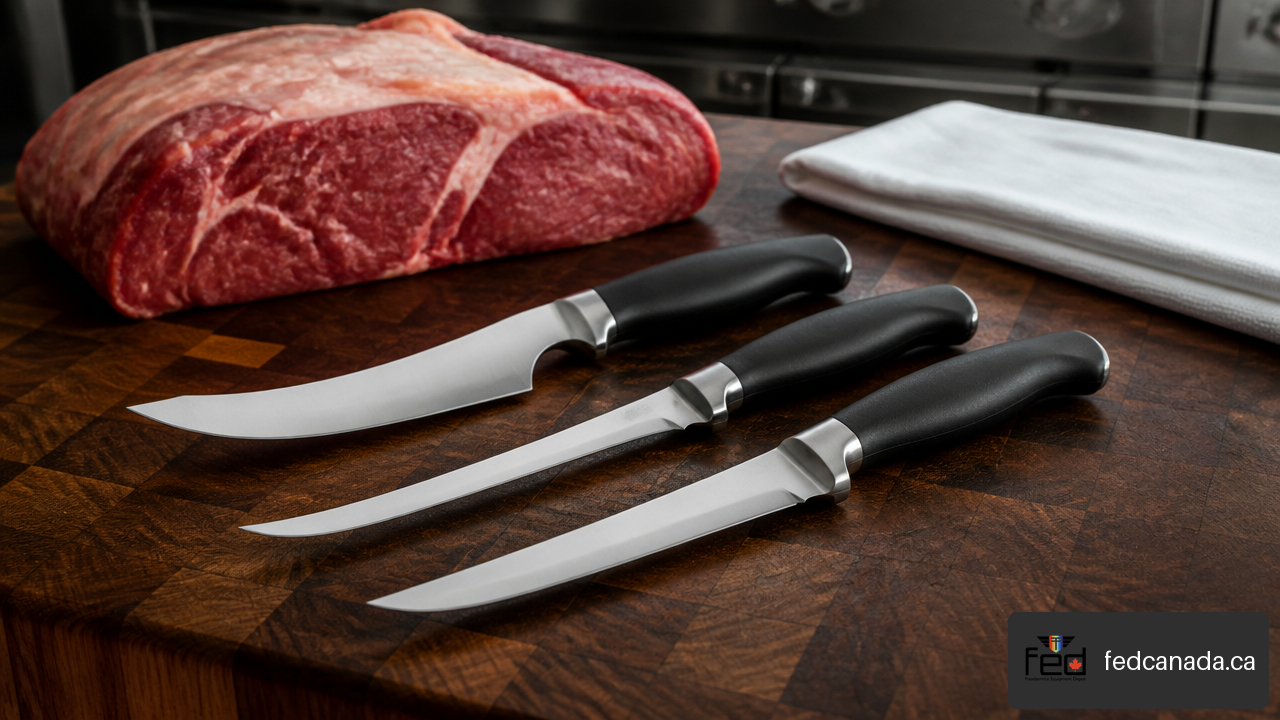
Butchers knives are purpose-built tools for breaking down, trimming, portioning, skinning, and preparing meat. The right blade does more than make a cut look cleaner: it affects control, usable yield, fatigue, sanitation, and safety. I recommend choosing a knife based on the motion you need to make, not simply the type of meat on the board.
Table of Contents
- How butchers knives differ from kitchen knives
- Matching blade geometry to the cut
- Choosing steel, handles, and a practical knife kit
- Maintenance and safe handling
- Key Takeaways
- FAQ
How Butchers Knives Differ From Kitchen Knives
A chef’s knife is designed as a versatile kitchen tool. It can slice vegetables, mince herbs, portion boneless proteins, and handle many everyday prep jobs. A butcher’s knife, by comparison, is generally shaped around a narrower set of meat-processing motions: tracing bone, separating joints, removing fat, dividing large muscles, or working through skin and connective tissue.
That specialization matters. A broad chef’s knife may be excellent for slicing a roast, but its height and wide blade can make it awkward around a chicken carcass. A thin boning knife can follow the curve of a rib cage efficiently, yet it is a poor choice for chopping through hard bone. Trying to force one blade through every task can damage the edge and reduce control.
The core butcher knife categories
Safe At Work BC notes that boning, butchering, sticking, and breaking knives have different functions and therefore different blade designs. Safe At Work BC’s guidance on specialized meat-cutting knives supports a simple buying principle: select the tool for the cut, rather than treating every sharp knife as interchangeable.
| Knife type | Best use | Blade behavior | When to avoid it |
|---|---|---|---|
| Boning knife | Separating meat from bones, joints, and ribs | Narrow profile, pointed tip, flexible or stiff | Splitting bone or heavy chopping |
| Breaking knife | Dividing large primals into manageable sections | Long blade with a curved belly for long strokes | Fine work around small bones |
| Trimming knife | Removing fat, silver skin, and connective tissue | Short, controlled blade | Long slicing passes through large roasts |
| Skinning knife | Separating hide or skin from tissue | Upward sweep helps maintain shallow cuts | Deep cuts near bone or joints |
| Cleaver | Chopping dense cartilage and suitable bone sections | Thick, heavy blade built for impact | Delicate slicing or precision boning |
| Meat saw | Cutting through substantial bone | Toothed cutting action | Boneless trimming and clean slicing |
Breaking bone is not the same as splitting bone
This distinction is easy to miss. A cleaver may be appropriate for an impact cut through cartilage or a manageable bone section when the tool and work surface are suited to the task. It is not a universal answer for every bone. Dense, thick, or irregular bones can deflect a struck blade, chip an edge, or send the cleaver off line.
For substantial bone cuts, a meat saw is often the more controlled option because it removes material through a repeated sawing action rather than a single forceful strike. A slicing-oriented butcher knife should not be used as a substitute for either tool. It can bend, break at the tip, or slip when forced against bone.
A useful rule is simple: slice with a slicing blade, chop with an impact-rated cleaver, and saw through bone when a controlled toothed cut is the better fit.
Why geometry matters more than labels
The printed name on a knife is less informative than its geometry. Four features determine much of its behavior:
Curvature: A pronounced belly supports long, gliding cuts. It is useful for breaking large cuts and skinning, where the blade should travel along a contour rather than plunge straight down.
Tip profile: A fine, pointed tip reaches joints, starts shallow trimming cuts, and lifts silver skin. A rounded tip may be preferable when reducing the risk of puncturing a hide or package.
Spine thickness: A thicker spine adds stiffness and weight, which can help in heavier work. A thinner blade moves more easily through soft tissue but is less tolerant of twisting or impact.
Flexibility: Flex lets a blade follow bone and reduce unnecessary gouging. Stiffness provides a more direct line when separating larger muscles or working in firm meat.
Matching Blade Geometry to the Cut
The best butchers knives are chosen by the cutting path. Ask where the blade will travel, what it will contact, and whether the work depends on a long slice, a controlled pull, a pivot at a joint, or a shallow separation.
Boning: flexible or stiff?
Choose a flexible boning knife when the blade must ride close to a curved surface. Poultry frames, fish bones, ribs, and skinning work often reward flexibility because the blade can follow the underlying structure instead of cutting away from it. This can preserve more usable meat, although the exact yield difference varies with technique and product.
Choose a stiff boning knife when you need the knife to resist bending. It can be easier to guide through dense connective tissue, firm beef, pork shoulders, or larger joints. A stiff blade is also less likely to wander if you are still developing knife skills.
Consider a pork shoulder. A flexible blade may hug the shoulder blade closely, but too much flex can feel unstable when you meet a tight seam. A stiffer boning knife may give a clearer sense of direction, though it may remove slightly more meat if pushed too aggressively against bone. There is no universal best choice; control and the anatomy of the cut decide it.
Breaking knives and long slicing strokes
A breaking knife is usually a better choice than a chef’s knife when dividing large boneless sections, separating primal cuts, or making long trimming passes. Canada Food Equipment describes breaking knives as longer, curved blades used to separate large primal cuts. This explanation of breaking knife design and use reflects why their curve is valuable: it keeps more of the cutting edge in contact with the meat during a pull or push stroke.
Rather than sawing back and forth in short strokes, use a sharp breaking blade in a deliberate, longer pass. This reduces tearing on a roast and can produce a smoother portion surface. The knife should be long enough to complete the intended stroke without excessive wrist movement, but not so long that the tip becomes difficult to control on a crowded board.
For many home processors, an 8 to 10 inch breaking knife is a practical range for larger cuts. Smaller workspaces, smaller hands, and compact cuts may call for a shorter blade. The right length is the one that clears the product while allowing you to keep the point and cutting path visible.
Trimming brisket and removing silver skin
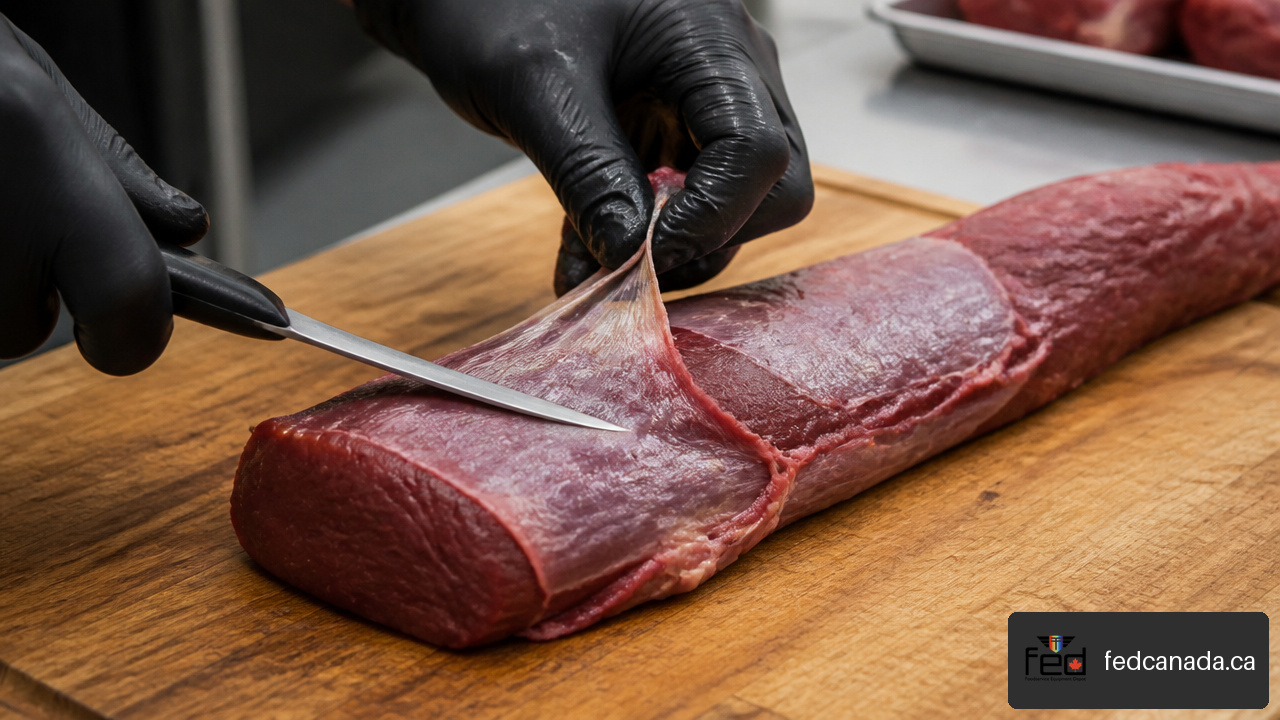
Use a trimming knife or narrow boning knife for brisket fat and silver skin. The goal is not to carve deep channels into the meat. Instead, place the tip just under the membrane, lift it slightly, and use shallow strokes while keeping the blade angle low.
For brisket, leave fat that serves the cooking plan and remove hard, waxy sections that will not render pleasantly. For tenderloin silver skin, a narrow blade lets you pull the membrane taut with a meat fork or protected supporting hand, then slide the edge beneath it. A wide chef’s knife can work, but it often removes more meat because there is less room to control the angle.
Curved knives and control
Curved butcher knives can be easier to control when the task benefits from a rolling or sweeping cut. Skinning and breaking are common examples. The curve helps the edge stay engaged through an arc, but it can be less predictable for a straight, detail-oriented incision.
Do not choose curvature simply because it looks more specialized. If your main task is trimming tenderloin, portioning boneless chicken, or working close to a joint, a straighter and narrower blade may provide better tip placement. Curvature should match movement, not aesthetics.
Choosing Steel, Handles, and a Practical Knife Kit
Blade material influences corrosion resistance, sharpening response, toughness, and edge retention. Still, steel type alone does not determine whether a knife will suit your work. Heat treatment, blade geometry, sharpening angle, cleaning habits, and handle comfort all matter.
Blade material: what to prioritize
Most commercial and home butcher knives use stainless or stainless-alloy steel because meat preparation involves moisture, salts, sanitation chemicals, and frequent washing. Stainless blades are generally easier to maintain in wet kitchen environments. Carbon steel may sharpen readily and develop a strong working edge, but it requires prompt cleaning and drying to limit staining and corrosion.
I recommend treating edge maintenance as more important than marketing claims about edge retention. A knife that stays sharp for a long time but is difficult to restore may be less useful than one that sharpens quickly and predictably. There is no single steel that is demonstrably best for every butcher task.
| Selection factor | Choose this when | Watch for |
|---|---|---|
| Stainless steel | You need lower-maintenance corrosion resistance | Do not assume all stainless blades hold an edge equally |
| Carbon steel | You can clean and dry the knife immediately after use | Patina, rust risk, and more demanding care |
| Stiff blade | You process firm meat or need direct control | Reduced ability to trace tight curves |
| Flexible blade | You work close to ribs, fish bones, or skin | Blade deflection under force |
| Textured synthetic handle | You need sanitation-friendly grip in wet work | Damage, cracks, or looseness at the handle joint |
Ergonomics are a safety feature
A handle should allow a secure, relaxed grip without forcing the wrist into an awkward angle. Look for a shape that does not rotate easily in wet hands, a transition between handle and blade that does not create pressure points, and enough handle length for your grip.
A comfortable handle is not merely a comfort upgrade. When the hand gets tired, users often grip harder, lose fine control, or change their cutting position. That is especially relevant during repetitive trimming or boning work.
Inspect a new or existing knife before use. A loose handle, cracked scales, bent blade, chipped edge, or damaged bolster changes how force travels through the tool. Remove a damaged knife from service rather than compensating with a tighter grip or more force.
A small, effective starter set
Most home cooks do not need every knife used in a meat department. A focused kit covers more ground and is easier to maintain.
- One 5 to 6 inch boning knife: Choose flexible for close contour work or stiff for firm cuts and greater direct control.
- One 8 to 10 inch breaking knife: Use it for larger roasts, primal sections, and long slicing passes.
- One trimming knife: Useful for fat, connective tissue, and silver skin when precision matters.
- A honing tool and sharpening system: A sharp knife is a process, not a one-time purchase.
- A protective sheath or scabbard: Essential if knives travel between storage, processing areas, or off-site events.
For a commercial kitchen, butcher knives should be considered alongside boards, meat holders, refrigeration, sanitation supplies, and prep stations. The broader importance of food preparation equipment becomes obvious when one missing tool slows an otherwise organized station.
Maintenance and Safe Handling
Sharpness is a control issue. A dull edge does not reliably bite into the surface of meat, so the user applies more pressure. When the edge finally moves, it may skid or release suddenly. That combination of extra force, fatigue, and an unpredictable cutting path is the real hazard.
Sharpening, honing, and edge checks
Honing and sharpening are different tasks. Honing realigns a slightly rolled edge; sharpening removes material to create a new edge. A honing rod will not repair a truly dull, chipped, or damaged knife.
Use this practical sequence:
- Check the edge before prep begins. If it drags, tears the surface, or needs pushing, it needs attention.
- Hone lightly when the edge feels slightly misaligned. Use controlled strokes and follow the tool manufacturer’s instructions.
- Sharpen when honing no longer restores clean cutting. A whetstone, guided sharpener, or professional sharpening service can work when used correctly.
- Clean away residue, then dry fully. Moisture left at the edge, handle joint, or sheath can shorten the life of the knife.
- Store the knife protected. Use a rack, guard, magnetic strip designed for knives, or scabbard that keeps the edge from contacting other tools.
For a deeper look at general blade selection and care, review how to choose and maintain chef knives. The same fundamentals of edge care and proper storage apply to specialized meat knives.
Safe workflow in the prep area
Keep meat stable on a cutting surface that does not move. If a roast, poultry piece, or primal is difficult to control, use a meat holder, fork, or prong instead of placing the supporting hand in the likely path of the blade.
Keep the path clear before every cut. That means moving towels, packaging, pans, cords, and hands out of the direction the knife could travel if it slips. Make deliberate cuts away from the body, and do not try to catch a falling knife.
For workplaces, cut-resistant gloves, gauntlets, or aprons may be appropriate based on the specific hazard assessment, task, training, and sanitation program. They are not a replacement for stable product, a sharp blade, or proper knife handling. A glove can reduce injury severity, but it does not make it safe to cut toward the supporting hand.
Failure modes that deserve immediate attention
| Condition | What can go wrong | Best response |
|---|---|---|
| Loose handle | Grip shifts under pressure | Remove from service and repair or replace |
| Bent blade | Cutting path becomes unpredictable | Stop using it; assess replacement or professional evaluation |
| Chipped edge | Blade catches and tears instead of slicing | Sharpen if appropriate or replace if damage is severe |
| Damaged sheath | Exposed edge can injure users in storage or transport | Replace the sheath before carrying the knife |
| Sliding board | Product and blade move together unexpectedly | Stabilize the board with a damp towel or non-slip base |
| Dull edge | More force and reduced control | Hone or sharpen before continuing |
Knife maintenance fits into the same operating discipline as cleaning, refrigeration checks, and equipment inspection. A routine for maintaining commercial food equipment can help make knife inspection and storage part of normal closing procedures rather than an afterthought.
Key Takeaways
Butchers knives should be selected by the cutting motion and anatomy involved, not only by the protein being prepared.
Flexible boning knives follow curves closely, while stiff boning knives provide more direct control in firm meat and around larger joints.
Breaking knives are designed for long, controlled strokes through large cuts; they are not substitutes for cleavers or meat saws.
Use a cleaver only for work suited to an impact-rated blade. For substantial bone, a meat saw is often the more controlled choice.
A sharp, well-maintained edge reduces the force needed to cut and helps preserve control.
Loose handles, bent blades, damaged sheaths, and sliding boards are failure points that should be corrected before cutting begins.
FAQ
What is the difference between a butcher knife and a chef’s knife?
A chef’s knife is an all-purpose prep knife, while butchers knives are specialized for meat-processing tasks such as boning, trimming, skinning, and breaking larger cuts. A chef’s knife can handle many boneless meat tasks, but a dedicated butcher knife offers geometry better suited to specific cuts.
Which butcher knife is best for cutting meat off bones?
A boning knife is the best starting point. Choose a flexible blade for working tightly around ribs, poultry frames, or fish bones. Choose a stiff boning knife for dense meat, firm connective tissue, and situations where you want less blade deflection.
What is a breaking knife used for?
A breaking knife divides larger cuts into smaller sections and handles long slicing passes through boneless meat. Its length and curve make it useful for separating primals, trimming larger roasts, and making smooth cuts through broad muscle groups.
Can a butcher knife cut through bone?
Most butcher knives should not be forced through bone. Boning, trimming, and breaking knives are designed primarily for slicing and separation. Use a suitable cleaver for appropriate chopping tasks, or a meat saw when cutting substantial bone requires a more controlled method.
What knife should I use for removing silver skin?
Use a narrow trimming knife or boning knife with a controllable tip. Slide the tip just beneath the silver skin, keep the blade angle shallow, and make small, deliberate strokes. The objective is to remove the membrane while leaving as much meat as possible intact.
How sharp should a butcher knife be?
It should begin cutting cleanly with light pressure rather than crushing, tearing, or requiring a forceful push. If the blade drags on the meat surface, catches unpredictably, or needs repeated sawing, hone or sharpen it before continuing.
Are cut-resistant gloves necessary when using butcher knives?
For home use, glove choice depends on the task, experience level, and likelihood that the supporting hand could enter the cutting path. In commercial settings, protective equipment should be selected through workplace hazard assessment and sanitation procedures. Gloves support safe work practices; they do not replace them.
What should I do if a butcher knife has a loose handle or bent blade?
Stop using it. A loose handle can rotate or shift under pressure, while a bent blade can redirect a cut unexpectedly. Repair through a qualified service when practical, or replace the knife if the defect cannot be corrected safely.
Sources/References
safeatworkca.com: https://www.safeatworkca.com/safety-articles/safe-cutting-for-butchers-and-meat-packers/
canadafoodequipment.com: https://www.canadafoodequipment.com/butcher-knife-types-uses/
Recent Posts


Leave a Comment
Your email address will not be published. Required fields are marked *