




Cheese Grater Guide: Types, Uses, Safety, and Cleaning
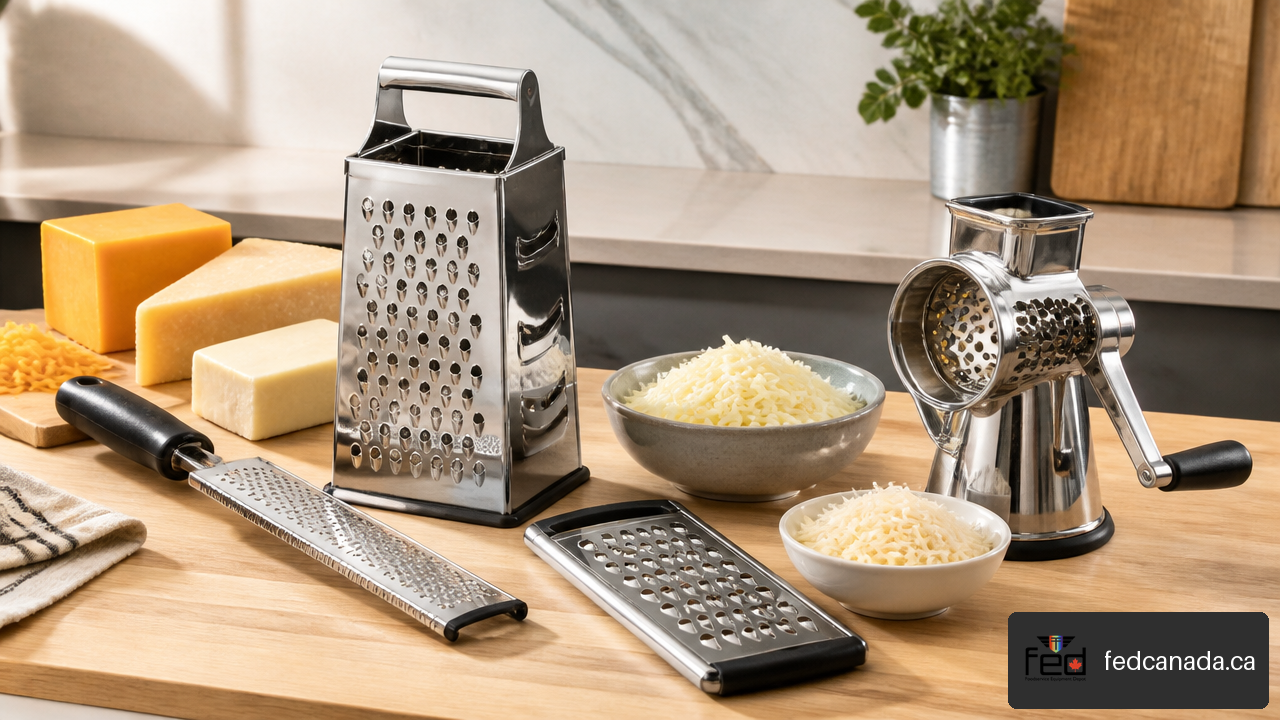
A good cheese grater does more than turn a block of cheese into shreds. The right cutting surface changes how cheese melts, how evenly it spreads over a pizza, and how much effort prep takes. A fine rasp creates airy Parmesan snow; a coarse surface produces substantial cheddar shreds; a rotary drum offers a more contained option for repeated use.
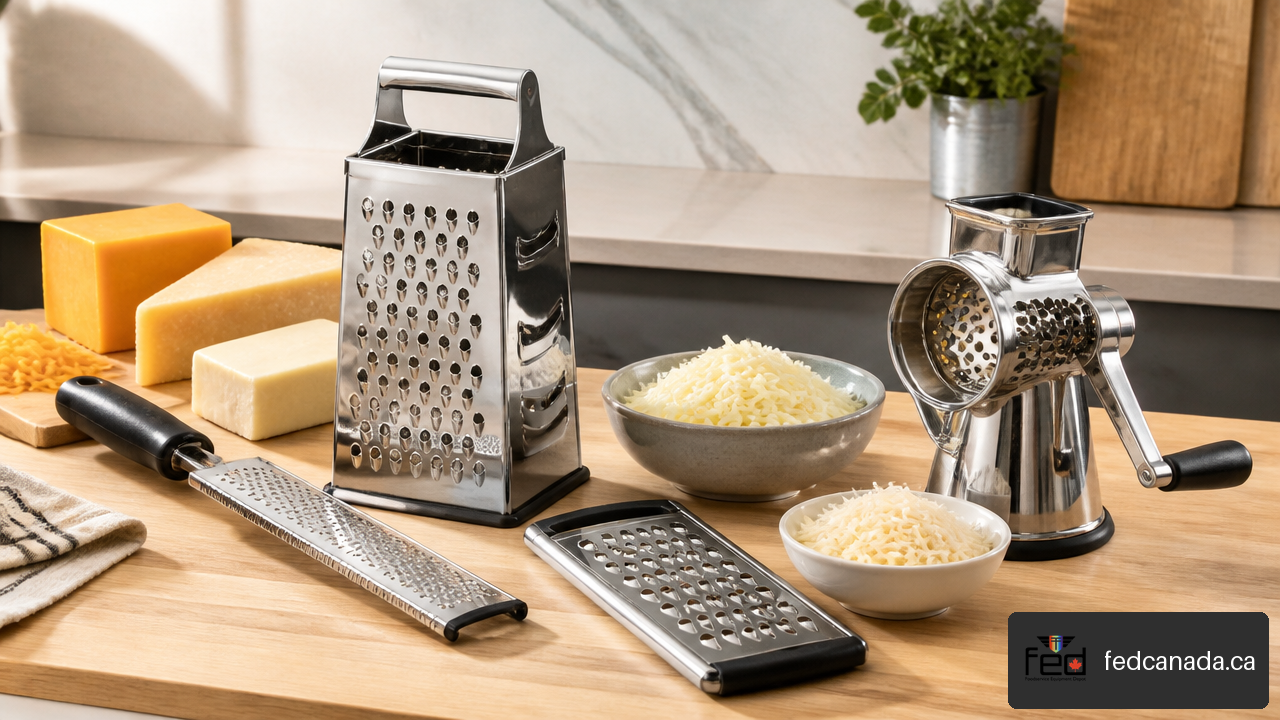
The best choice depends on three practical factors: the firmness of the cheese, the texture the recipe needs, and the amount you prepare at one time. I recommend starting with output texture rather than shopping by tool shape alone. That approach prevents a common frustration: buying a grater that technically works but produces the wrong result.
Table of Contents
- Choose a Cheese Grater by Cheese and Texture
- Use Your Grater More Effectively
- Grate Cheese Safely and With Control
- Clean and Maintain a Cheese Grater
- Key Takeaways
- Frequently Asked Questions
Choose a Cheese Grater by Cheese and Texture
Start with the result you want on the plate
Shredding, grating, and rasping are related but not identical. The difference is mainly the size and shape of the particles produced by the grater tooth geometry.
| Output | Typical texture | Best use | Common grater surface |
|---|---|---|---|
| Coarse shreds | Long, thicker strands | Pizza, casseroles, baked pasta | Coarse box grater or rotary drum |
| Medium shreds | Shorter, more even strands | Tacos, salads, sandwiches | Medium shredding surface |
| Fine grate | Small particles that melt quickly | Sauces, soups, baked dishes | Fine box-grater face |
| Fine rasp | Light, airy flakes or powder-like pieces | Pasta finishing, risotto, salads | Rasp-style grater |
| Slices | Thin, broad pieces | Gratins, sandwiches, garnishes | Slicing blade or drum |
A coarse shred leaves visible pockets of cheese and melts more slowly. Fine particles disperse faster, which can be useful in a sauce but less desirable if you want a thick pizza topping. The tool is not merely changing preparation speed; it is affecting how the cheese behaves under heat.
For Parmesan, Pecorino, Grana Padano, and similarly hard aged cheeses, a fine rasp-style grater is usually the most sensible choice. In a community discussion about hard-cheese tools, users specifically recommended rasp-style graters for Parmesan because they create light, airy shavings rather than heavy conventional strands. See the discussion on fine rasp graters for Parmesan for that texture-focused perspective.
Match the grater to cheese firmness
Cheese firmness determines whether it will cut cleanly, smear, crumble, or compress against the blade. A very hard cheese resists the teeth and responds well to small, sharp openings. A semi-firm cheese can pass through larger teeth and form recognizable shreds. A soft cheese may bend, stick, or bunch before it cuts.
| Cheese category | Examples | Best starting choice | Watch for |
|---|---|---|---|
| Hard aged cheese | Parmesan, Grana Padano, Pecorino | Fine rasp or fine grating surface | Crumbling if the cheese is extremely dry |
| Semi-firm cheese | Cheddar, Swiss, Colby, Monterey Jack | Box grater with medium or coarse face | Warming and sticking during long prep |
| Low-moisture mozzarella | Pizza mozzarella, provolone | Coarse box grater, rotary drum, processor for volume | Compression inside narrow tools |
| Softer cheese | Fresh mozzarella, brie, very soft goat cheese | Knife, wire, or chilled slicing method | Smearing rather than clean grating |
Box graters remain a practical all-purpose option because one tool can offer several cut sizes. Community cooks commonly associate box graters with cheddar, Colby, Swiss, and similar semi-firm cheeses, while rotary graters are sometimes favored for mozzarella and Muenster. That does not make either tool universally better. It shows why the cheese itself should guide the choice.
Choose a tool based on workload, not hype
For occasional cooking, a manual grater is often enough. For repeated service, family-size meals, pizza preparation, or catering batches, the workload changes the equation.
| Tool type | Choose it when | Avoid it when | Main trade-off |
|---|---|---|---|
| Box grater | You need several textures from one compact tool | You need maximum hand protection or large-volume output | Versatile but requires careful hand positioning |
| Handheld or plane-style grater | You grate small amounts directly over food | You need a large pile of shreds quickly | Easy to store but less stable than a box grater |
| Fine rasp | You want delicate hard-cheese flakes | You need coarse cheddar shreds | Excellent texture control, limited batch capacity |
| Rotary grater | You value enclosed cutting and repeated portions | You need broad, long shreds | More parts to clean and store |
| Electric grater or food processor | You prepare substantial quantities repeatedly | You only grate a few tablespoons at a time | Faster output, but setup and cleanup can outweigh the benefit for small jobs |
A useful community rule of thumb is to use a box grater for small quantities and a powered appliance for larger volumes. That distinction appears in a community discussion comparing small-batch and powered grating. There is no universal quantity threshold because cleanup tolerance matters. If you need cheese for one baked dish, manual grating may be faster overall. If you are portioning cheese for repeated menu prep, powered equipment can reduce repetitive work.
Canadian retail listings also show how broad the category has become: Canadian cheese-grater listings include handheld, box, fine, and rotary formats, with some stainless-steel and dishwasher-safe options. The label “dishwasher-safe,” however, should not be confused with “easy to clean.”
Use Your Grater More Effectively
Chill cheese for cleaner cutting
Cold cheese is generally easier to handle because it is firmer and less likely to deform under pressure. This is especially useful with cheddar, mozzarella, Swiss, and other cheeses that can become tacky when left at room temperature.
There is no single proven temperature that works for every cheese and tool. Still, a practical approach is simple: refrigerate the cheese until firm, then grate it promptly. If it begins leaving a greasy film, bending around the teeth, or packing into openings, pause and return it to the refrigerator for a short time.
For example, a block of low-moisture mozzarella may grate cleanly at first but start bunching after several minutes near a warm oven or stovetop. The problem may not be dull teeth. The cheese may simply be warming faster than the grater can cut it.
Prevent clogging and cheese bunching
Cheese bunching occurs when cheese compresses against or inside a grater instead of passing cleanly through its openings. It can happen with soft cheese, dull cutting edges, damp residue, overly warm cheese, or a drum whose openings do not match the cheese’s texture.
Try these recovery steps before replacing the tool:
- Chill the cheese until it feels firm and dry on the surface.
- Use shorter, controlled strokes instead of forcing the block downward.
- Clear the cutting surface with a brush or scraper before residue hardens.
- Change the grating surface if the output is compressing instead of shredding.
- Inspect the teeth for bending, flattening, or trapped debris.
A plane-style grater may help when accumulation is the main annoyance. In one recommendation thread, community users reported preferring plane-style graters because cheese could be less likely to bunch on the tool. That observation is not a controlled comparison, but it is a useful practical clue when evaluating a plane-style grater for reduced cheese bunching.
Build grating into an efficient prep workflow
Grating is often one small step in a larger sequence. Keep the cheese cold until needed, prepare a clean receiving bowl, and separate varieties before beginning. That prevents cheddar and Parmesan from mixing unintentionally and makes portioning easier.
For pizza stations and other high-output prep areas, place the grater or processing equipment beside the scale, storage containers, and sanitation supplies rather than treating it as a last-minute task. These tips for utilizing prep tables effectively can help organize the rest of that workflow.
Commercial kitchens may also benefit from deciding where manual tools remain sensible and where equipment should take over. The broader importance of food preparation equipment becomes clear when a repetitive task begins slowing down service or creating inconsistent portions.
Grate Cheese Safely and With Control
Stabilize the tool before the cheese
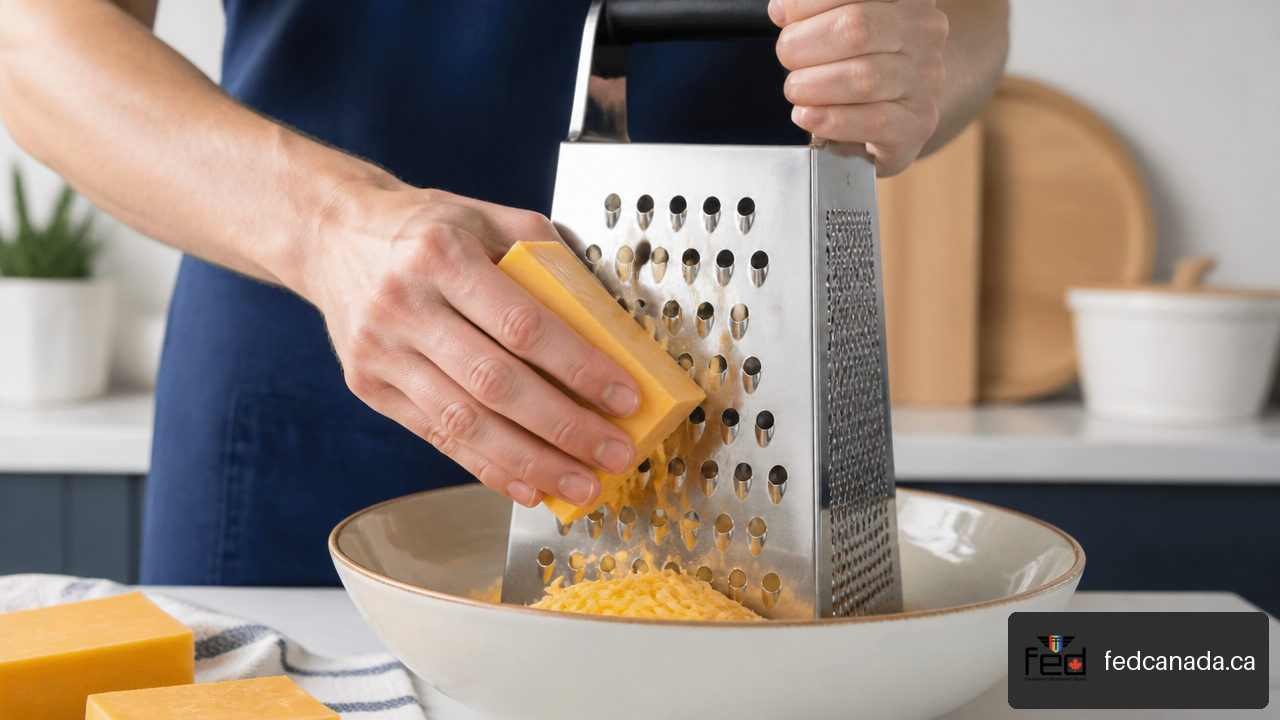
The most important safety rule is simple: stabilize the grater and the receiving surface before moving the cheese. A box grater should sit on a dry, flat cutting board or inside a shallow bowl with enough room for the base. A handheld grater should be braced over a stable bowl or plate, not held loosely in midair.
Avoid rushing through the last piece of cheese. That is when fingers move closest to the teeth and grip becomes less secure.
Fair warning: A grater does not need to look sharp to cut skin. Small raised teeth can catch a fingertip quickly when pressure and speed increase.
Use a safe hand position and stopping point
Hold the cheese with fingertips curled away from the cutting surface. Push with the heel of the hand and the larger surface of the fingers, not the tips. Maintain a predictable forward-and-back motion rather than twisting the cheese at an angle.
Stop when the remaining piece becomes too thin to grip safely. Do not try to extract every last shred by hand. Reserve the small end for stock, a sauce, a snack, or a recipe where it can be melted whole.
A safety guard can make this easier. Guards are particularly useful with handheld graters, rotary graters, and compact slicer attachments. They are not always convenient with tiny cheese pieces, but that inconvenience is preferable to forcing fingers near the blades.
Choose designs that fit the task and your grip
Rotary graters can provide more separation between hands and cutting teeth because the cheese sits inside a chamber or hopper. They are not automatically risk-free: fingers can still be caught during loading, drum changes, or cleaning. Disconnect electric models before removing blades or clearing food.
For people who find repeated pressure uncomfortable, a rotary or electric unit may reduce direct contact with the blade. Before purchasing, check handle orientation, non-slip feet, drum removal, safety guards, and whether replacement parts are available.
A grater should also be treated like any other cutting tool. Good hand positioning, storage, and cleaning practices complement the principles in this guide on how to choose and maintain chef knives.
Clean and Maintain a Cheese Grater
Clean before residue dries
Cheese fat and protein can settle into narrow openings, especially on fine graters and rotary drums. The easiest time to remove residue is shortly after use, before it dries and hardens.
- Rinse the grater under warm running water as soon as practical.
- Use a dish brush to scrub in the direction of the teeth, away from your hand.
- Apply dish soap and brush both the flat surface and the reverse side.
- Rinse thoroughly and inspect the openings under good light.
- Dry completely before storage to reduce moisture around seams, handles, and moving parts.
Do not wipe aggressively across exposed teeth with a sponge or bare cloth. Fibers can snag, and fingers can slip. A narrow brush gives better access with less risk.
Dishwasher-safe is not the same as residue-free
Some rotary models are marketed as dishwasher-safe, and Canadian listings include manual and electric tools with interchangeable blades, drums, and functions beyond cheese. See Canadian multipurpose grater listings for examples of those product categories.
Still, dishwasher suitability only means a component is designed to tolerate that cleaning method under the manufacturer’s instructions. It does not guarantee that water spray reaches packed cheese in every hole, drum seam, or blade housing.
If using a dishwasher, pre-rinse first and inspect after the cycle. Hand-clean intricate parts when residue remains. For electric units, follow the manufacturer’s care instructions and keep motorized bases out of water unless explicitly designed otherwise.
Protect cutting performance and storage condition
Stainless steel is a common grater material because it resists corrosion and is relatively easy to sanitize. Durability still depends on construction. A thick stainless-steel surface with securely formed teeth and a solid handle generally matters more than a vague “professional” label.
Store the grater where teeth will not be crushed against heavy pots or dulled by loose utensils. For box graters, a dry cabinet is usually enough. For fine rasp graters, a protective cover helps protect both the teeth and anyone reaching into the drawer.
Replace a grater when teeth are bent, flattened, loose, visibly corroded, or difficult to clean safely. A tool that requires excessive force is not merely inconvenient; extra force reduces control.
Key Takeaways
Make the decision with texture, firmness, and volume
Choose a fine rasp for hard cheeses when you want light, delicate shavings.
Choose a box grater for everyday semi-firm cheeses such as cheddar, Swiss, and Colby when you need several shred sizes.
Choose a rotary grater when a more enclosed cutting path, repeatable portions, or hand comfort matters most.
Choose an electric grater or food processor when batch size and frequency justify setup and cleanup.
Keep cheese cold and firm to reduce smearing, sticking, and cheese bunching.
Stop grating before the cheese becomes too small to hold safely, and use a safety guard whenever the design supports one.
Clean promptly with a brush, inspect fine openings, and dry every component fully before storage.
Frequently Asked Questions
What is the best type of cheese grater for everyday cooking?
A box grater is usually the most practical everyday choice because it offers coarse, medium, and fine surfaces in one tool. Choose a rotary model instead if you prioritize an enclosed design or find direct hand pressure uncomfortable. Add a fine rasp if Parmesan is a frequent finishing cheese.
Is a box grater better than a handheld cheese grater?
Neither is always better. A box grater is more stable and offers more cut sizes, making it useful for recipe prep. A handheld grater is easier to store and works well when grating a small amount directly over pasta, soup, or a salad. The better choice depends on batch size and the texture required.
Which cheese grater works best for Parmesan?
A fine rasp-style grater is generally the best starting point for Parmesan because it produces fine, airy particles that distribute evenly over food. Use a fine box-grater face if you need more volume, but expect a somewhat denser result.
What grater should I use for cheddar or mozzarella?
Use a medium or coarse box-grater surface for cheddar. For low-moisture mozzarella, use a coarse box grater, rotary drum, or powered processor when preparing larger batches. Keep both cheeses cold to improve clean shredding. Fresh mozzarella is usually better sliced or torn than grated.
Are rotary cheese graters easier to use than box graters?
They can be easier for people who prefer a crank handle and a chamber that keeps hands farther from the cutting surface. However, rotary graters have more components, may limit the shape of cheese blocks you can load, and can take longer to disassemble and clean. They work best when the added control outweighs the extra cleanup.
Is an electric cheese grater worth buying for large batches?
It can be worthwhile when you grate cheese frequently or prepare substantial quantities at once. For occasional home cooking, a manual tool may be more efficient overall because it requires little setup. Consider storage space, removable blade availability, electrical compatibility, warranty terms, and cleaning requirements before buying.
How do I stop cheese from sticking to a grater?
Start with cold, firm cheese. Use steady strokes without excessive pressure, clean residue from the teeth before it builds up, and switch to a different surface if the cheese is compressing instead of cutting. If the cheese is very soft, chilling it further or choosing a knife may be more effective than forcing it through a grater.
Can a cheese grater go in the dishwasher?
Only place it in the dishwasher if the manufacturer states that the specific tool or component is dishwasher-safe. Pre-rinse first, then inspect the grater after washing because fine holes and drum seams can retain residue. Hand washing with a brush is often the most reliable method for fine-grating surfaces.
Sources and References
Best Buy Canada — Cheese Graters: https://www.bestbuy.ca/en-ca/shop/home-living/cheese-graters
Best Buy Canada — Multipurpose Graters: https://www.bestbuy.ca/en-ca/shop/home-living/multipurpose-graters
Reddit r/Cooking — Cheese graters: https://www.reddit.com/r/Cooking/comments/1ank7od/cheese_graters/
Reddit r/AskCulinary — Cheese grater: https://www.reddit.com/r/AskCulinary/comments/1hhv6kq/cheese_grater/
Reddit r/Cooking — Rec me a good cheese grater: https://www.reddit.com/r/Cooking/comments/15ov5ys/rec_me_a_good_cheese_grater/
Recent Posts



Leave a Comment
Your email address will not be published. Required fields are marked *