




Measuring Cups: How to Measure, Convert, and Choose Correctly
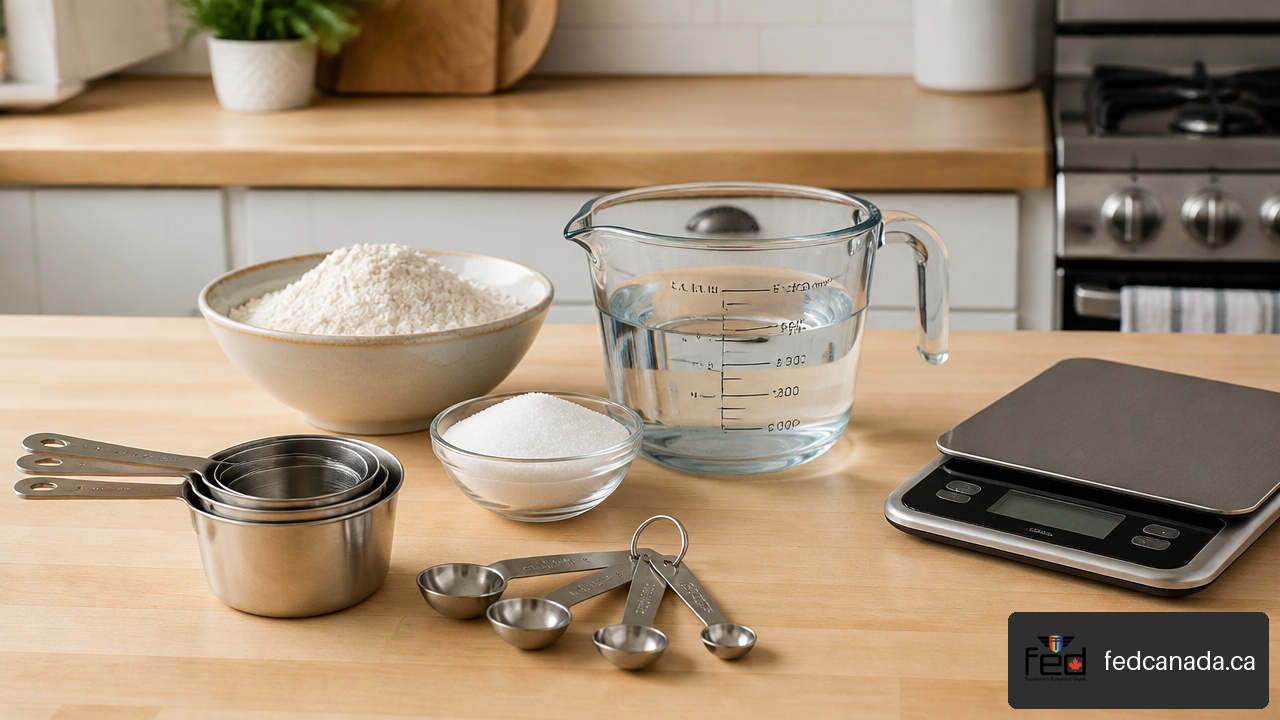
Measuring Cups look simple, but the right tool and technique can determine whether a sauce stays balanced, a dough rises properly, or a batch of cookies spreads too far. For everyday cooking, cups are fast and practical. For baking and repeatable food production, the details matter: cup convention, filling method, ingredient behavior, readable markings, and when to switch to grams.
Table of Contents
Dry and Liquid Measuring Cups: What Each Tool Does
Measuring cups measure volume, meaning the amount of space an ingredient occupies. A cup of water and a cup of flour may fill the same volume, but they do not have the same mass in grams because their density is different.
The most reliable approach is to match the tool to the ingredient’s physical behavior. A dry measuring cup makes it easy to fill to the rim and level the surface. A liquid measuring cup gives liquids room below the rim, so you can pour and read a marked line without spilling.
Dry measuring cups for levellable ingredients
A dry measuring cup is usually a small metal or plastic cup with a flat rim. Sets are often sold as nested measuring cups in 1 cup, 1/2 cup, 1/3 cup, and 1/4 cup sizes.
Use dry cups for ingredients that can be filled and levelled, including:
Flour, cocoa powder, powdered sugar, and cornstarch
Granulated sugar, brown sugar, oats, rice, and breadcrumbs
Nuts, dried lentils, quinoa, and similar dry foods
Shortening, peanut butter, or other semi solid ingredients when a recipe calls for a cup measure
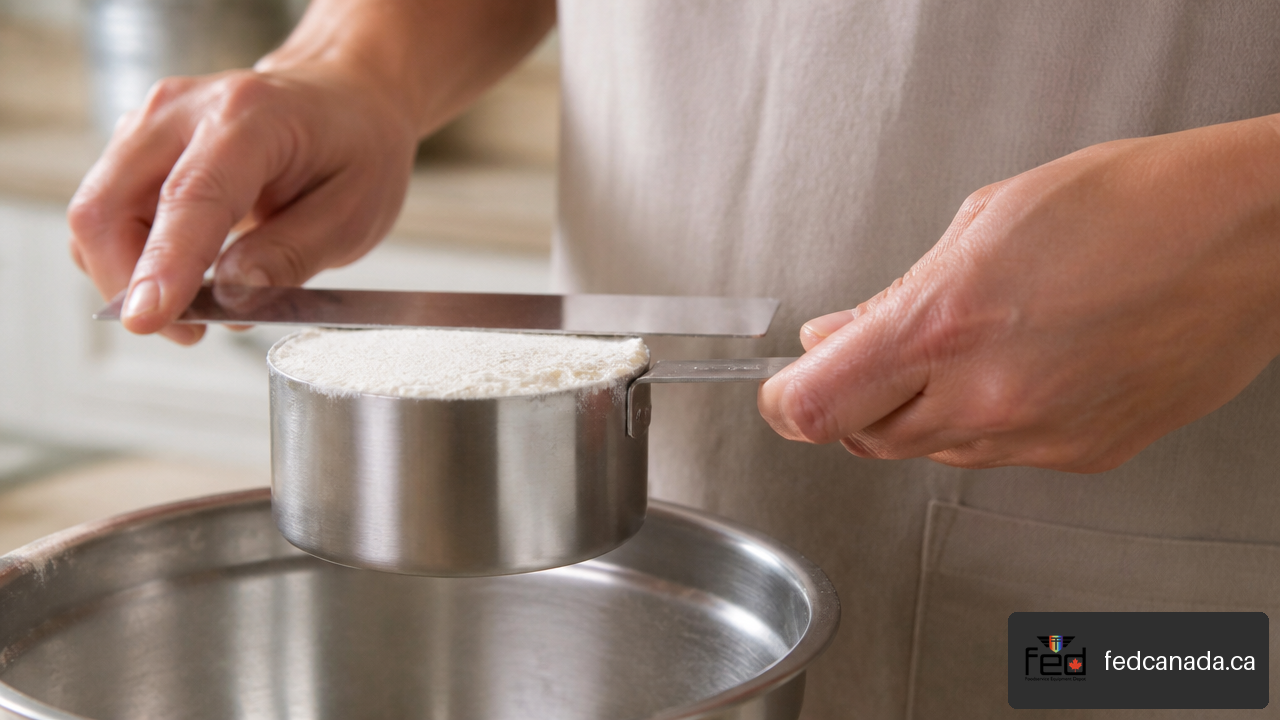
The rim matters. Fill the cup, then sweep a straight edge across the top to remove excess. This creates a repeatable volume without guessing where the ingredient surface should sit.
For flour, the method is especially important. Health Canada advises cooks to spoon flour into a dry cup and level it rather than scoop directly from the bag, because dipping and dragging the cup through packed flour can compress it and add more than the recipe intends.
Liquid measuring cups for pourable ingredients
A liquid measuring cup is typically a clear jug with a handle, pouring spout, headroom, and printed or moulded graduations. It is designed for water, milk, stock, oil, vinegar, syrups, and other pourable ingredients.
The extra space above the top line is not decorative. It reduces spills while you move the cup from counter to bowl. The side markings also let you measure amounts such as 125 mL, 175 mL, or 375 mL without combining several dry cups.
To read a liquid measurement, set the cup on a level counter and bend down so your eyes are level with the marking. Liquids form a curved surface called a meniscus. For clear, water based liquids, read the bottom of that curve at the desired line.
A dry cup can hold water, and a liquid cup can hold flour. The issue is not whether either container can contain the ingredient. It is whether the tool makes the required measurement easy to fill, level, pour, and read consistently.
Measuring spoons and the small quantity problem
When a recipe calls for 1 tbsp, 1 tsp, or 1/4 tsp, measuring spoons are usually better than estimating a fraction of a cup. Small quantities leave less room for error. An extra teaspoon of baking powder or salt has a much larger effect on a recipe than a slightly high measure of chopped herbs.
Community baking discussions also point out that liquid surface tension and line reading become more consequential at very small volumes. Use a spoon or a small graduated measure close to the amount needed rather than trying to judge a shallow layer in a large jug.
Cup Sizes, Millilitres, and Recipe Conversions
Before converting any recipe, identify what its writer likely means by “cup.” Canadian cooks often encounter metric, US, and older imperial conventions in cookbooks, online recipes, packaging, and family recipes. They are close enough to seem interchangeable, but not always close enough for precision baking.
The cup conversion numbers worth knowing
The table below separates volume units from weight units. Fluid ounces and millilitres describe volume. Ounces by weight and grams describe mass.
| Measure | Approximate equivalent | Best use |
|---|---|---|
| 1 metric cup | 250 mL | Many Canadian, Australian, and metric style recipes |
| 1 US customary cup | 236.6 mL | Many US recipes and product instructions |
| 1/2 metric cup | 125 mL | Sauces, grains, and common Canadian recipe measures |
| 1/3 metric cup | About 83 mL | Dry ingredients and recipe portions |
| 1/4 metric cup | About 60 mL | Oils, sauces, and smaller dry measures |
| 1 tbsp | 15 mL | Dressings, seasoning blends, and small additions |
| 1 tsp | 5 mL | Leavening, extracts, salt, and spices |
| 1 US fluid oz | About 29.6 mL | US liquid recipes |
A practical Canadian workflow is to look for mL values first. If a recipe says “1 cup” and also lists 250 mL, its intended target is clear. If it gives “1 cup” and 8 US fl oz, treat it as a US recipe. When no metric amount is provided, consider the recipe’s country of origin, publisher, package directions, and other units used nearby.
Why grams cannot be converted from cups once and for all
A cup is volume. A gram is mass. The conversion depends on the ingredient.
One cup of water is close to 250 g when measured as 250 mL, but one cup of flour is much lighter, while one cup of honey is much heavier. Even flour does not have one universal cup weight: sifted, spooned, scooped, settled, or packed flour can occupy the same cup volume at different masses.
This is why a chart that claims every cup of flour always equals one exact gram value can be misleading. Use a recipe’s stated gram quantity when available. If a recipe only uses cups, use its specified filling method and stay consistent from batch to batch.
A practical workflow for ambiguous recipes
If the word “cup” is unclear, work through these steps before starting:
Check whether the recipe provides mL, grams, US fluid ounces, or package measurements elsewhere.
Identify the source. A US publisher may use a US customary cup, while a metric recipe may use 250 mL.
Look for ingredient instructions such as “packed,” “sifted,” “spooned,” or “firmly packed.” These words change the result.
For baking, use grams if the author provides them. If not, choose one cup convention and record what you used.
Do not convert fluid ounces to ounces by weight. They measure different things.
For recurring recipes, it can help to measure by cup once, weigh that measured ingredient in grams, and record the result. Over time, this creates a household specific reference for the ingredients and cup set you actually use.
How to Measure Ingredients Accurately
Technique often creates more variation than the material of the cup. Stainless steel, glass, and plastic can all work well when their capacities and graduations are intact. The larger issue is how the ingredient enters the measure and how it settles inside.
In a baking discussion about cup accuracy, users reported that filling technique can create more practical variation than cup material or brand alone. That is community evidence, not controlled testing, but it matches a sensible operational rule: standardize the process before blaming the tool.
The correct method depends on ingredient structure
| Ingredient type | Best primary tool | Filling method | When a scale is better |
|---|---|---|---|
| Flour and cocoa | Dry measuring cup | Spoon in gently, then level | Bread, pastries, cakes, and high volume production |
| Granulated sugar | Dry measuring cup | Fill and level | Precise confectionery or recipe development |
| Brown sugar | Dry measuring cup | Pack only when the recipe says packed | Recipes where texture depends on sugar ratio |
| Water, milk, stock | Liquid measuring cup | Read at eye level on a flat surface | Large batches and formula based production |
| Oil and syrup | Liquid cup or spoon | Use a close size, pour slowly | Small quantities where transfer loss matters |
| Peanut butter and shortening | Dry cup or scale | Press into cup, level, then scrape | Any recipe where exact fat ratio matters |
Flour is the ingredient most likely to expose poor technique
Flour traps air and compresses easily. If you scoop it directly from a bag, the cup may act like a shovel: flour compacts against the sides and bottom, leaving you with a heavier amount than a gently filled cup.
The more controlled method is simple:
Fluff the flour lightly with a spoon if it has settled.
Spoon flour into the dry measuring cup until it is slightly overfull.
Do not tap, shake, or press the cup.
Sweep a knife or straight spatula across the rim.
Add the flour to the bowl without packing it during transfer.
Users discussing flour accuracy have similarly reported that different flour handling methods can substantially change the amount in the same nominal cup. The useful lesson is not that cups are unusable. It is that “one cup” only becomes repeatable when the method is repeatable.
When to use a kitchen scale instead
Use measuring cups when speed and convenience matter more than fine precision: soups, sauces, weekday meals, and recipes that tolerate modest variation. Use a scale when the ratio itself controls the result.
Choose grams for:
Yeasted doughs, pastry, cakes, macarons, and other baking sensitive formulas
Large batch recipes that must be reproduced across shifts or locations
Ingredients measured in small but influential amounts, such as salt, yeast, and chemical leaveners
Costed recipes where portion control affects purchasing and food cost
Recipe testing, where one changed variable should be easy to identify
Baking communities regularly distinguish the convenience of a liquid jug and levellable dry cups from the repeatability of a scale. In particular, users recommend scales when precision matters more than quick volume measurement.
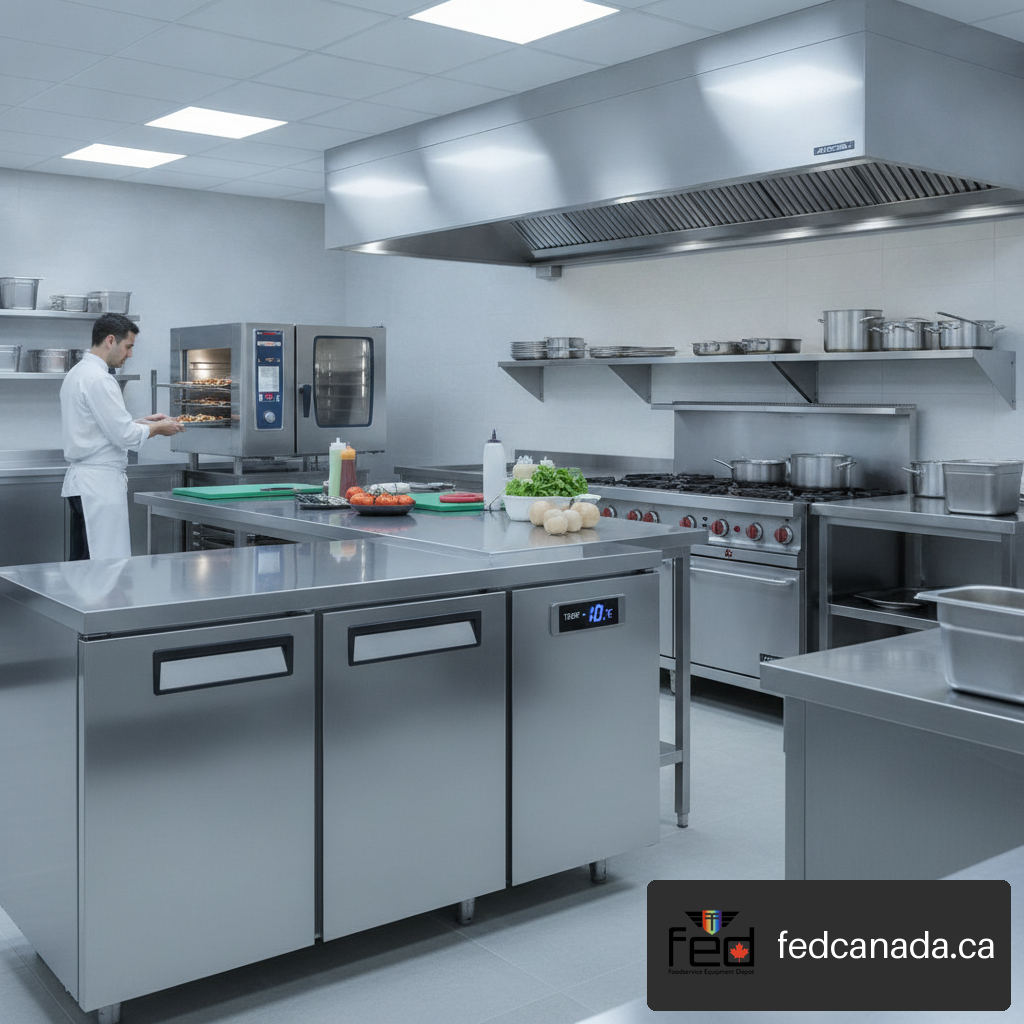
For foodservice operations, measuring tools belong in a larger prep system. Clear storage, standardized scoops, and stable work surfaces reduce rushed measuring. Importance of food preparation equipment becomes more obvious when a prep station must produce the same sauce or dough throughout a busy service.
Choosing, Testing, and Maintaining Measuring Cups
The best measuring cup is not necessarily the most expensive one. Choose a set that matches how you cook, can be read quickly, and will remain usable after repeated washing and handling.
What to look for before buying
For dry measuring cups, look for flat, sturdy rims that can be levelled cleanly. For liquid cups, prioritize high contrast graduations, a stable base, a comfortable handle, and enough headroom above the highest marking.
Useful selection criteria include:
Clearly moulded or permanently marked volume lines rather than faint printed markings
A complete dry cup set with common fractions and matching measuring spoons
A liquid jug with both mL and cup markings if you use recipes from multiple sources
Smooth interiors that release sticky ingredients and are easy to clean
Materials suited to the task: stainless steel for durable dry cups, glass or clear plastic for visible liquid levels
Material does not automatically prove capacity accuracy. A well made plastic liquid jug may be easier to read than an opaque metal vessel, while a stainless dry cup may be easier to level than a tall plastic scoop. Choose based on the measurement action, not appearance alone.
A repeatable home capacity check
There is no universal household testing standard that guarantees every cup’s exact accuracy. Still, you can check whether a cup appears consistently oversized or undersized by comparing water measurements with a kitchen scale.
Because water has a density close to 1 g per mL under ordinary kitchen conditions, this method can reveal a meaningful mismatch without requiring laboratory equipment.
Put an empty container on a digital scale and tare it to zero.
Fill the measuring cup with water using its normal intended method. For a dry cup, fill to the brim without a dome. For a liquid jug, fill to the chosen line at eye level.
Pour the water into the tared container and note the mass in grams.
Repeat at least three times, drying the cup between trials if droplets affect the fill line.
Compare the readings. A 250 mL target should produce a water mass close to 250 g, while a US cup target should be closer to 237 g.
This does not replace certified calibration. It does help separate two problems: a cup that has a consistent capacity issue versus a process that changes with each fill. If three readings differ widely, improve the technique first. If the readings are tightly grouped but consistently far from the intended volume, replace the cup or reserve it for noncritical tasks.
One online comparison reported differences under 5% for some cup sets and as high as 15% for another, but that user comparison is anecdotal rather than a general product tolerance. It is a prompt to inspect your own tools, not a reason to assume every set is inaccurate.
Replace tools when the markings stop doing their job
A measuring cup is no longer dependable when you cannot confidently identify its intended volume. Replace a liquid cup if graduations fade, crack, warp, or become hard to distinguish from scratches. Replace dry cups if the rim bends, the handle loosens, or the size stamp disappears.
In commercial kitchens, organization supports accuracy just as much as the cup itself. Keeping cups, spoons, and scales close to ingredients reduces improvisation during prep. Choosing the right food preparation table can help create enough clear space for a scale, mixing bowl, ingredient bins, and measuring tools to work together.
Equipment planning also has a practical side. While measuring cups need no electrical connection, a well designed prep area may include mixers, processors, refrigeration, and other powered equipment. Understanding kitchen power systems helps put these small hand tools into the wider commercial kitchen setup.
Key Takeaways
The most dependable measuring routine
Use a dry measuring cup for ingredients you can fill to the rim and level.
Use a liquid measuring cup for pourable ingredients that must be read at a marked line.
Treat 250 mL and a US cup of 236.6 mL as different targets when recipe precision matters.
Spoon and level flour rather than dipping the cup into the bag.
Use measuring spoons for tbsp and tsp quantities instead of estimating from a large cup.
Switch to grams when baking ratios, portion consistency, or repeatable production matter.
Test suspicious cups with repeated water and scale checks before assuming a recipe is wrong.
Replace cups with faded markings, bent rims, cracks, or deformation.
Frequently Asked Questions
What is the difference between dry and liquid measuring cups?
Dry measuring cups are made to be filled to the brim and levelled. Liquid measuring cups have side graduations and headroom so liquids can be poured and read without spilling. Both measure volume, but their designs support different actions.
Should I scoop flour or spoon it into a measuring cup?
Spoon it in gently, then level the top. Direct scooping can compact flour in the cup and produce more flour than the recipe intended. Avoid tapping or shaking the cup after filling.
How many millilitres are in one cup in Canada?
Many Canadian recipes use a metric cup of 250 mL. However, Canadian cooks also use US recipes, where a cup is about 236.6 mL. Check for mL, fluid ounces, recipe origin, and package instructions before converting.
Can I use a liquid measuring jug for flour?
You can, but it is less practical. Flour is difficult to level accurately inside a deep jug, and side markings are harder to use with uneven powders. A dry cup is the better choice when measuring flour by volume.
Can I use a dry measuring cup for water?
Yes, especially if you need a full cup quantity. Fill it carefully to the rim and transfer slowly. For partial amounts, a liquid cup with mL lines is usually easier and less likely to spill.
Why do two measuring cups give different results?
The difference may come from cup capacity, faded or incorrect markings, recipe convention, or filling technique. Test each cup with repeated water measurements on a scale before deciding the container is at fault.
Are measuring cups accurate enough for baking?
They can be adequate for forgiving recipes when the filling method is consistent. For breads, pastries, cakes, and recipes that depend on precise ratios, grams on a kitchen scale are the more repeatable choice.
Why can two recipes list different gram weights for one cup of flour?
The recipes may use different cup conventions or different flour handling methods. A spooned and levelled cup, a dipped cup, and a packed cup can contain different masses of flour even when each is called “one cup.”
Sources and References
Government of Canada — Measure ingredients like a pro: https://www.canada.ca/en/health-canada/services/food-guide/eating-support/kitchen/cooking-skills/measure-ingredients-pro.html
Reddit, r/AskBaking — What kind or brand is the most accurate measuring cups and measuring spoons?: https://www.reddit.com/r/AskBaking/comments/n47uja/what_kind_or_brand_is_the_most_accurate_measuring_cups_and_measuring_spoons/
Reddit, r/Baking — Measuring cups: https://www.reddit.com/r/Baking/comments/12gytuw/measuring_cups/
Reddit, r/BakingNoobs — Can Measuring Cups be Inaccurate?: https://www.reddit.com/r/BakingNoobs/comments/wa9b9o/can_measuring_cups-be-inaccurate/
Reddit, r/AskBaking — High quality and accurate measuring cups?: https://www.reddit.com/r/AskBaking/comments/12zrmwk/high_quality_and_accurate_measuring_cups/jhtbb6w/
Recent Posts


Leave a Comment
Your email address will not be published. Required fields are marked *