




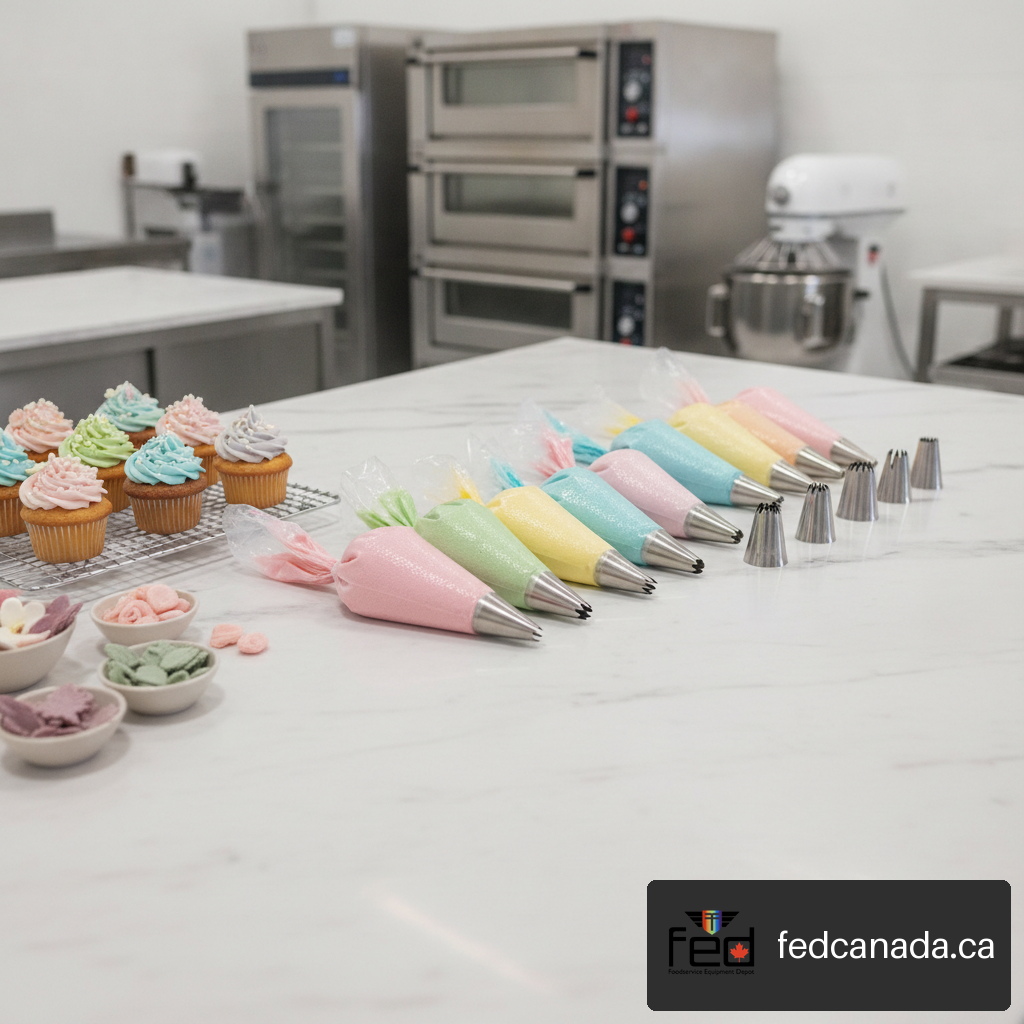
Piping Bags & Tips: A Practical Guide to Extrusion and Decorating
A piping bag is one of the most versatile tools in modern baking, allowing bakers, pastry chefs, and home cooks to extrude semi-solid foods with precision, speed, and clean artistic control. Whether you are piping delicate macarons, building structured cake layers, shaping choux pastry, or finishing a chocolate raspberry truffle tart recipe, mastering the mechanics of your bag and tip setup is essential. Understanding how material flexibility, tip geometry, and filling consistency interact will help you maintain control over your decorating and prevent common kitchen mishaps like bursting seams or air-spitting nozzles.
Table of Contents
- Key Takeaways
- Understanding Piping Bags: Mechanics, Materials, and Extrusion Dynamics
- Anatomy of Piping Tips and Coupler Compatibility
- Step-by-Step Workflow: Filling, Sealing, and Ergonomic Control
- Troubleshooting Piping Bag Failures and Consistency Issues
- Sanitation, Care, and Reuse Decision Framework
- Frequently Asked Questions
- Sources and References
Key Takeaways
Material Selection Driven by Viscosity: Match your bag material to your filling. Flexible disposable plastic works well for soft frostings, while heavy canvas, coated polyester, or thick silicone is necessary to prevent bursting when extruding dense choux dough, cold buttercream, or stiff royal icing.
Couplers Enable Versatility: Using a two-piece coupler allows you to swap out nozzle designs without emptying or replacing the bag mid-project.
Air Pocket Elimination: Folding the bag over a tall container or drinking glass creates a wide, hands-free opening for clean filling while reducing trapped air that causes sputtering.
Gradual Trimming is Critical: Always cut the narrow tip of your piping bag in tiny increments; over-cutting creates an oversized opening that can force tips or couplers to blow out under pressure.
Pressure Dynamics: Control the flow of icing exclusively from the top twist using your dominant hand, while using your lower hand only for direction and stability.
Understanding Piping Bags: Mechanics, Materials, and Extrusion Dynamics
A piping bag (also commonly referred to as a pastry bag) operates on simple fluid mechanics: applying external compressive force to a flexible, tapered vessel forces semi-solid media through a narrow orifice. According to BBC Good Food, piping bags are commonly made from baking parchment or plastic and are squeezed to decorate baked goods, though canvas and silicone options cater to heavy commercial workloads.
How Piping Bags Work: Extrusion Physics and Flow Resistance
Extrusion resistance—the physical force required to push a filling through a piping tip—is governed by three dynamic factors: internal friction along the bag lining, filling viscosity, and nozzle cross-sectional area. As filling is pushed into a narrow orifice, dynamic pressure increases dramatically inside the bottom portion of the bag.
- Viscosity & Temperature: Cold, firm buttercream or stiff royal icing creates exceptionally high resistance. As internal resistance climbs, hand squeezing pressure must increase proportionally.
- Orifice Diameter: A tip opening cut down from 12 mm to 2 mm increases the required squeezing force exponentially. When high viscosity meets a small tip opening, weaker bag seams naturally split.
- Friction Loss: Textured internal bag linings increase drag, whereas smooth plastic or silicone interiors allow dense batters to slide cleanly toward the tip.
Comparing Piping Bag Materials: Plastic, Silicone, Cloth, and Parchment
Choosing the right piping bag material depends on production volume, budget, environmental preferences, and filling characteristics. Alongside other essential pastry tools like rolling pins, having an assortment of piping bags tailored to different tasks helps maintain efficiency.
| Material | Primary Advantages | Main Limitations | Ideal Applications |
|---|---|---|---|
| Disposable Plastic (PE/LDPE) | Hygienic, single-use, transparent, zero post-baking cleanup required | Single-use plastic waste; prone to seam popping under high stress | High-volume production, royal icing, brightly dyed frostings |
| Silicone | Heat resistant, tear proof, highly flexible, reusable | Can feel slick or stretchy; prone to retaining oil films if washed improperly | Warm fillings, mashed potatoes, medium-consistency frostings |
| Coated Canvas / Polyester | Maximum tensile strength; structural integrity under intense pressure | Opaque; requires rigorous sanitation and thorough drying | Stiff cookie doughs, choux pastry, cold buttercreams |
| Parchment Paper | Inexpensive, customizable size, zero cleanup, recyclable | Extremely fragile; holds minimal volume; prone to tearing at tips | Fine detail writing, melted chocolate work, small accent borders |
Matching Bag Material to Filling Stiffness and Temperature
Selecting an incorrect bag material can lead to mid-operation structural failure. Use these decision rules when planning your bake:
Heavy-Duty / Dense Fillings (Choux Pastry, Spritz Cookie Dough, Cold Meringue): Require thick silicone or heavy coated canvas. Thin disposable plastic bags will stretch and burst at the side seam under the force required to extrude thick doughs.
Warm or Liquid Media (Warm Ganache, Warm Jelly, Molten Chocolate): Parchment cones or food-grade silicone work best. Polyethylene plastic bags can soften when exposed to elevated temperatures, weakening their structural integrity.
Detailed Royal Icing & Fine Line Accent Work: Small parchment cones or thin 8-inch to 10-inch disposable plastic bags provide maximum tactile feedback and fingertip precision.
Anatomy of Piping Tips and Coupler Compatibility
A piping bag relies on precision tips (or nozzles) to shape extrusions. As The Spruce Eats notes, piping tips create different decorative effects by shaping the food as it exits the bag. Understanding tip geometries and attachment mechanisms ensures predictable results every time.
Core Decorative Tip Families and Visual Effects
Piping tips are primarily manufactured from stainless steel or nickel-plated brass. Plastic tips are also available, though metal tips feature sharper teeth edges that yield crisp, clean lines.
- Round Tips (e.g., #2, #10, #1A): Smooth circular openings. Used for writing, piping macaron rounds, creating dots, stemlines, bead borders, and layering round cake fillings.
- Open Star Tips (e.g., #16, #1M, #4B): Circular openings lined with straight triangular teeth. Perfect for classic cupcake swirls, star borders, textured rosettes, and shell borders.
- Closed Star Tips (e.g., #2D, #352): Teeth angle inward toward the center, creating deep, tight grooves in extruded frosting. Ideal for crisp rose swirls and ruffled borders.
- Leaf Tips (e.g., #67, #352): V-shaped cutouts that expand outwards, creating pointed leaves, ruffles, and draped ribbon borders.
- Petal & Rose Tips (e.g., #104, #125): Teardrop-shaped openings that drop from wide to thin. Used to build realistic flower petals, roses, ranunculus, and delicate swags.
- Basketweave Tips (e.g., #47, #48): Dual-sided tips featuring one smooth edge and one serrated edge. Used to weave intricate basket textures and flat ribbed bands.
The Mechanics of Couplers vs. Direct-Tip Insertion
A coupler is a two-piece plastic adapter (base collar and outer ring) designed to lock piping tips onto the outside of a bag. Using a coupler offers distinct functional differences compared to inserting a tip directly inside the bag:
Direct-Tip Insertion: Drop the tip directly into an untrimmed bag, push it firmly down to the tip, mark the bag, pull the tip back up slightly, and cut the plastic. Advantage: Highly secure, fewer parts, zero external plastic bulk. Disadvantage: You cannot change tips without emptying the entire bag.
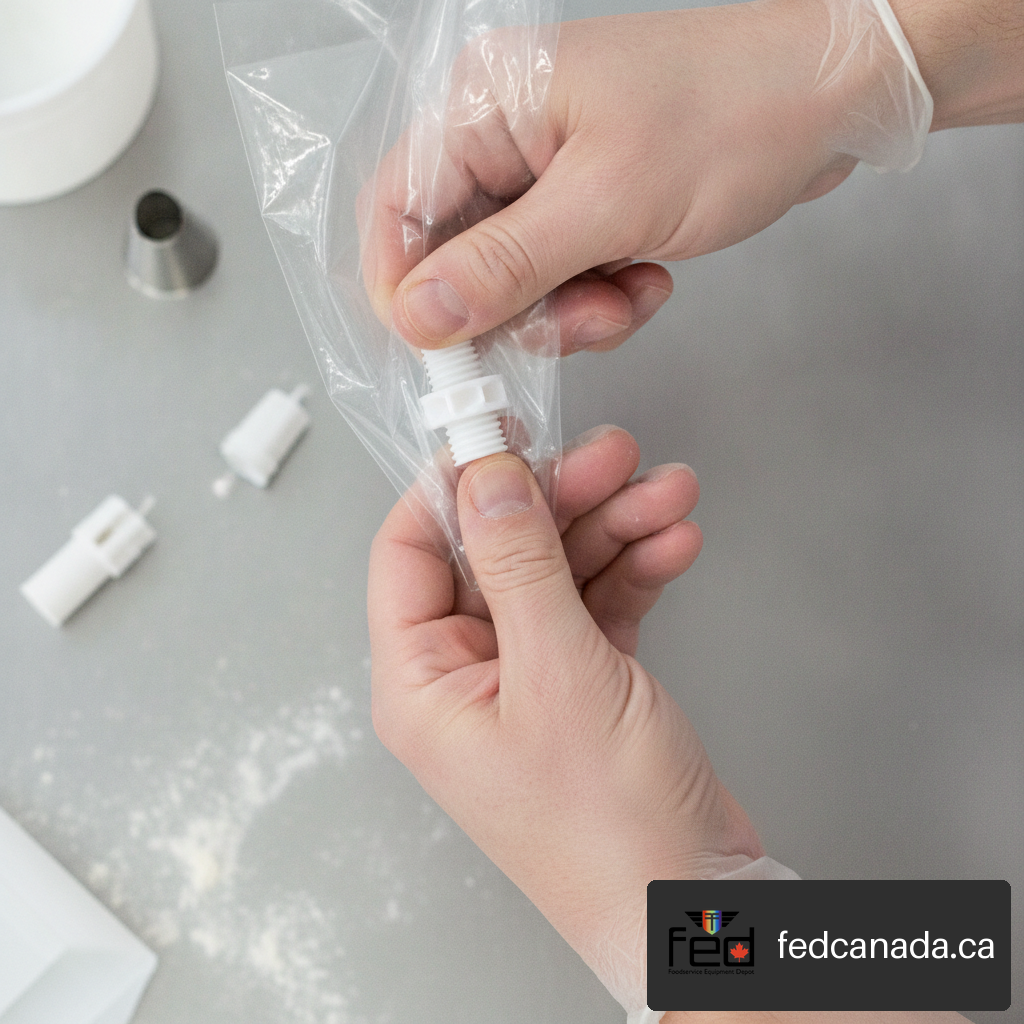
Coupler Assembly: Insert the threaded main base inside the bag, mark and cut the bag material just below the threads, pop the tip over the protruding external base threads, and screw the outer ring down over the tip. Advantage: Allows rapid swapping between different tip designs while retaining the same batch of icing. Disadvantage: Adds bulk and presents a potential failure point if cross-threaded.
Step-by-Step Pre-Cut Checklist for Fitting Tips
Cutting your piping bag correctly is irreversible. Follow this checklist before extruding any filling:
- Determine the Fitting Type: Decide whether you are using an internal tip, standard coupler, or large specialty coupler.
- Measure First: Slide your tip or coupler base as far down into the narrow end of the bag as it will comfortably go.
- Mark the Trim Line: Use a pencil or dry-erase marker to draw a light guideline across the bag. Mark the line halfway down the body of the tip (for direct insertion) or just below the lowest threads (for a coupler).
- Retract the Tool: Push the metal tip or plastic base back up toward the wide end of the bag so your scissors do not dull against metal or cut through plastic.
- Trim Gradually: Cut off less plastic than you think is necessary. Snip straight across the marked line.
- Expose and Lock: Slide the tip or coupler base back down into the newly cut opening. For direct tips, one-half of the tip body should sit snugly outside the cut plastic. For couplers, all threads must clear the cut edge so the outer ring can lock fully onto the base.
Step-by-Step Workflow: Filling, Sealing, and Ergonomic Control
Clean execution starts before you begin squeezing. Setting up a tidy workspace and using proper filling techniques reduces air bubbles, keeps your hands clean, and prevents wrist strain.
Staging and Filling Without Trapping Air Pockets
Trapped air pockets are the primary cause of sudden sputtering, ruined icing lines, and uneven borders. Follow this structured process to stage and fill your piping bag cleanly:
- Lock the Bottom: If using a direct tip without a coupler, fold or twist the narrow neck of the bag right above the tip opening and tuck it into the tip cavity. This creates a mechanical seal that stops liquid or loose fillings from dripping out during loading.
- Cuff over a Support Container: Place the bag inside a tall, heavy-bottomed container, such as a large drinking glass, quart container, or measuring pitcher. Fold the top 3 to 4 inches of the bag wide open down over the outside edge of the container to create a deep, wide collar.
- Load in Centered Batches: Using a flexible silicone spatula, transfer your filling into the center cavity of the bag. Deposit filling in small, focused batches rather than dumping massive scoops that scrape against the upper rim.
- Uncuff and Squeeze Downward: Flip the folded top cuff back up to fully extend the bag. Use a bench scraper or the flat side of your hand against the outside of the bag to push the filling smoothly downward toward the tip, forcing air pockets up and out through the top.
Establishing the Working Fill Limit and Bag Seal
Overfilling a piping bag severely compromises hand control and increases internal force. Operating at the proper capacity maintains ergonomic efficiency:
The 50% to 60% Capacity Rule: Never fill a piping bag past one-half to two-thirds of its total height. The upper portion must remain completely empty to allow for a secure twist seal.
Establishing the Mechanical Twist: Gather the empty top portion of the bag tightly above the filling mass. Twist the bag material firmly until the filling compresses gently downward toward the tip. Maintain this twist under tension with your dominant hand thumb and index finger.
Optional Securing Clamps: For long decorating sessions or stiffer frostings, lock the twist using a silicone piping bag tie, rubber band, or bag clip to prevent the top seal from unwinding.
Hand Placement, Posture, and Pressure Dynamics
Proper body posture and hand ergonomics prevent muscle fatigue during long decorating sessions:
- Dominant Hand (The Engine): Wrap your dominant hand securely around the top twisted seal of the bag, resting your palm against the upper icing mass. Squeezing pressure must come entirely from squeezing your palm and fingers of this hand.
- Non-Dominant Hand (The Steering Wheel): Lightly rest the fingers of your non-dominant hand near the lower tip of the bag. Do not squeeze with this hand. Use these fingers strictly to stabilize, aim, and maintain elevation off the surface of your cake or pastry.
- Posture & Body Angle: Stand upright with your shoulders relaxed, elbows tucked close to your torso, and eyes aligned directly above the piping zone. Avoid holding the bag at a flat angle unless specifically creating leaf or petal patterns; most standard piping techniques require a 45-degree or perpendicular 90-degree angle to the working surface.
Troubleshooting Piping Bag Failures and Consistency Issues
When piping goes wrong, identifying the root cause quickly saves time and ingredients. The breakdown matrix below maps common symptoms to immediate practical solutions.
Failure-Mode Matrix: Bursting, Clogging, and Top Leaks
| Observed Symptom | Primary Structural Cause | Secondary Contributing Factor | Immediate Action / Correction |
|---|---|---|---|
| Side Seam Splits / Bag Bursts | Extrusion resistance exceeds material seam strength | Filling is too cold, thick, or tip opening is undersized | Warm filling slightly, switch to a larger tip, or transfer to high-tensile canvas/silicone |
| Icing Squirts Out Top of Bag | Overfilling combined with weak upper hand seal | Bag was filled beyond 60% capacity; top untwisted during use | Reduce batch volume; tie off top with a rubber band or bag clip |
| Tip Blows Out / Pops Off Bag | Bag opening trimmed too large | Excessive squeezing force applied to direct-inserted tip | Re-bag filling into a new bag cut with a smaller, snug opening |
| Sputtering / Explosive Gaps | Trapped air pockets within the filling mass | Vigorous whipping or sloppy loading technique | Remove tip, squeeze contents back into bowl, remix to pop air bubbles, re-stage bag |
| Frosting Curdles or Melts Line | Thermal transfer from warm hands through bag | Filling contains high butter fat content with low melting point | Wear thin cotton gloves under vinyl gloves, or chill bag in fridge for 5 minutes |
Diagnosing and Correcting High Extrusion Resistance
If you find yourself straining to push filling out of the bag, stop immediately—increasing hand pressure will likely cause your bag to split at the seam or blow out the nozzle.
Step 1: Check Filling Temperature: Cold buttercreams and ganaches solidify quickly. Touch the bag exterior; if it feels cold, let it sit at room temperature for 10–15 minutes, or hold the bag in warm hands to soften the outer layer.
Step 2: Inspect Viscosity: If your icing is structurally too firm for fine piping tips, mix 1/2 teaspoon of milk, cream, or light corn syrup into your icing bowl to slightly lower its viscosity before re-filling.
Step 3: Evaluate Tip Diameter: Trying to pipe stiff dough through a #2 round tip creates extreme back-pressure. Match stiff media with large opening tips (such as #1M or #1A).
Clearing Clogs and Preventing Line Sputtering
Clogs occur when un-dissolved powdered sugar, fruit seeds, citrus zest, or cocoa lumps block the small opening of your tip.
- Clearing a Live Clog: Do not keep squeezing. Insert a clean toothpick or fine pin directly into the external nozzle opening to break apart the obstruction. If necessary, unscrew the outer coupler ring, remove the tip, clean out the debris, and reinstall.
- Prevention Through Sifting: Always pass dry ingredients (powdered sugar, cocoa powder, spice blends) through a fine-mesh sieve prior to beating them into frostings. Pass fruit purées through a chinois strainer before adding them to pipeable fillings.
Sanitation, Care, and Reuse Decision Framework
Proper cleaning of reusable canvas and silicone piping bags is critical to prevent bacterial growth and oil degradation.
Deep Cleaning Protocols for Fatty and Pigmented Fillings
Buttercream, royal icing, and ganache leave behind heavy fats and strong food dyes that degrade bag linings over time. Follow these steps to restore reusable bags:
- Invert the Bag: Turn the silicone or canvas bag inside out completely to expose all interior seams.
- Degrease with Hot Water: Rinse thoroughly under hot running water (at least 120°F / 49°C) to melt residual fats and wash away sugar solids.
- Apply Concentrated Soap: Scrub internal surfaces using a grease-cutting dish soap and a soft-bristled brush. Avoid abrasive scouring pads, which can scratch internal coatings.
- Sanitize (Optional for Commercial Work): Submerge silicone bags in a mild sanitizing solution or boil them for 3 minutes if permitted by manufacturer instructions.
- Air-Dry Completely: Hang inverted bags in a well-ventilated area until 100% dry before storing. Storing damp canvas or coated polyester bags will lead to mold growth and lingering odors.
Storage, Inspection, and Material Degradation Rules
Knowing when to retire a reusable bag keeps your baking space hygienic and safe:
Retire Canvas / Cloth Bags If: You notice permanent dark discoloration along seams, fraying threads near the tip cut, or persistent rancid oil odors that remain after deep washing.
Retire Silicone Bags If: The silicone exhibits sticky surface degradation (polymers breaking down from fat contact), tears along the seam, or loss of elasticity.
Storage Best Practices: Store clean, dry bags lying flat or rolled loosely in a clean drawer away from direct sunlight and sharp edge tools.
Frequently Asked Questions
What is a piping bag?
A piping bag is a flexible, cone-shaped bag used to extrude soft or semi-solid foods—such as frosting, whipped cream, batter, or purées—through a narrow tip opening for decorating or precise portioning.
What is the difference between a piping bag and a pastry bag?
There is no functional difference. "Piping bag" and "pastry bag" are terms used interchangeably across home and commercial kitchens to describe the exact same culinary extrusion tool.
What can you use a piping bag for besides frosting?
Piping bags excel at handling savory and non-frosting applications, including piping choux paste for eclairs, portioning macaron batter, filling deviled eggs, shaping duchess potatoes, filling ravioli pasta dough, and piping French macarons.
How do you fill a piping bag without making a mess?
Place your bag inside a tall container or drinking glass, fold the upper cuff 3 to 4 inches down over the container rim, and deposit filling into the bottom using a silicone spatula. Flip the cuff back up and push the filling down toward the tip.
How full should a piping bag be?
Fill your piping bag to roughly 50% to 60% of its total capacity. Overfilling causes icing to overflow out the back end when squeezing and reduces hand control.
Why does my piping bag keep bursting?
Piping bags burst when internal extrusion resistance exceeds seam strength. Common causes include using filling that is too cold or thick, using an undersized tip for dense batter, overfilling the bag, or using thin disposable bags for high-pressure doughs.
Do you need a coupler for a piping bag?
No, a coupler is optional. You can drop a piping tip directly into an untrimmed bag, mark the height, cut the plastic, and squeeze. However, using a two-piece coupler lets you swap tips mid-project without replacing or emptying the bag.
Sources and References
The Spruce Eats: What Is a Piping Bag?
BBC Good Food: How to Make a Piping Bag
Recent Posts


Leave a Comment
Your email address will not be published. Required fields are marked *